Michael Wandrey Tutorial 16

Michael Wandrey’s Surreal Compositions with PixelSquid

Michael Wandrey, aka @Foxmikey1 on Instagram, is a popular digital artist and photographer who has made incredible works of surrealist art using PixelSquid objects. His racing snail composition using a PixelSquid Engine and Snail were featured in a full two-page spread in the 2019 edition of PhotoshopBIBEL. He’s shared his process for creating this super-charged racing snail as a video (linked above) and broken down into steps below!
 

Tutorial: Creating Racing Snail with PixelSquid

First, we’ll open up a new 6000×4000 pixel canvas at 150 DPI. Begin with a New Layer and draw a Radial Gradient from the center to the edge:
 
Michael Wandrey Tutorial 2
 
Open the PixelSquid Extension and select the snail. Once the snail is positioned correctly, a Levels Adjustment Layer can be created as a Clipping Mask.
 
Michael Wandrey Tutorial 3
 
Next, open a new object (the Sci-fi Engine)  from the PixelSquid Extension. Position the machine as shown on the image and adjust the Levels with another Clipping Mask.
 
Michael Wandrey 4


Create a New Layer below the Sci-fi Engine Levels Adjustment Layer you just created, and set the Blend Mode to Soft Light. Now, take a Soft Brush and draw a light black shade below the snail shell with a Covering Power of 15%. The opacity of the layer should be around 78%. We also need a second engine shadow layer above the machine level.

Now we take a bigger Soft Brush with 15% opacity, and draw the shadow on the edge between the snail shell and the machine. Create a Mask and remove the superfluous black on the machine.

Now we can produce the smoke with a PixelSquid object called smoke thick volcano. Position it and create a Mask for this layer as well, and remove unnecessary spots as shown on the picture.

Create a Levels Adjustment Layer as a Clipping Mask for this object as well:


Michael Wandrey Tutorial 5

Now we create a New Layer, and fill it with a flame texture and a Mask, removing the superfluous flame parts.

Above that, we can help the Brightness/Contrast with another Adjustment Layer:

 
Michael Wandrey Tutorial 5a
 
For the shadow of the snail, we’ll need the same snail from the PixelSquid Extension and position it as shown. Instead of duplicating the layer, make sure you insert the same snail as a New Object.
 
Michael Wandrey Tutorial 6
 
To get the shadow right, we need to Rasterize the layer. Now we can use the Deforming Tool to adjust the shadow to fit it.
 
Michael Wandrey Tutorial 6a
 
Now we have to desaturate the shadow. To do this, let’s create a Tone Correction Layer as a Clipping Mask and drag the lower slider all the way to the left.
 
Michael Wandrey Tutorial 6b
 
The shadow can now be weakened by using the Gaussian Blur with about 12%. The shadow has to get brighter in the end, so set the transparency of the layer to 40%.
 
Michael Wandrey Tutorial 7
 
To make the snail look like it is realistically on the ground, we need a ground shadow. To do this, add a New Layer and draw the shadow between the snail and the reflection shadow we added earlier.
 
Michael Wandrey Tutorial 8
 
Now we Merge Layers (all) for the first time (shift + alt + cmd + e) and open up the RAW Filter. Here you can now see all settings within the RAW Editor. The opacity for this layer is 80%. You can see some of the settings that were toggled in the screenshots below, but every unique image will have its own settings.
 

Michael Wandrey Tutorial 9a

 
Michael Wandrey Tutorial 9b-c-d
Michael Wandrey Tutorial 9e-f-g
 
Now we Merge Layers (all) a second time, and open up the NIK-Filter (Color Efex) and set the properties as shown in the pictures below. The opacity for this layer is 70%.
 
Michael Wandrey Tutorial 10a-d
 

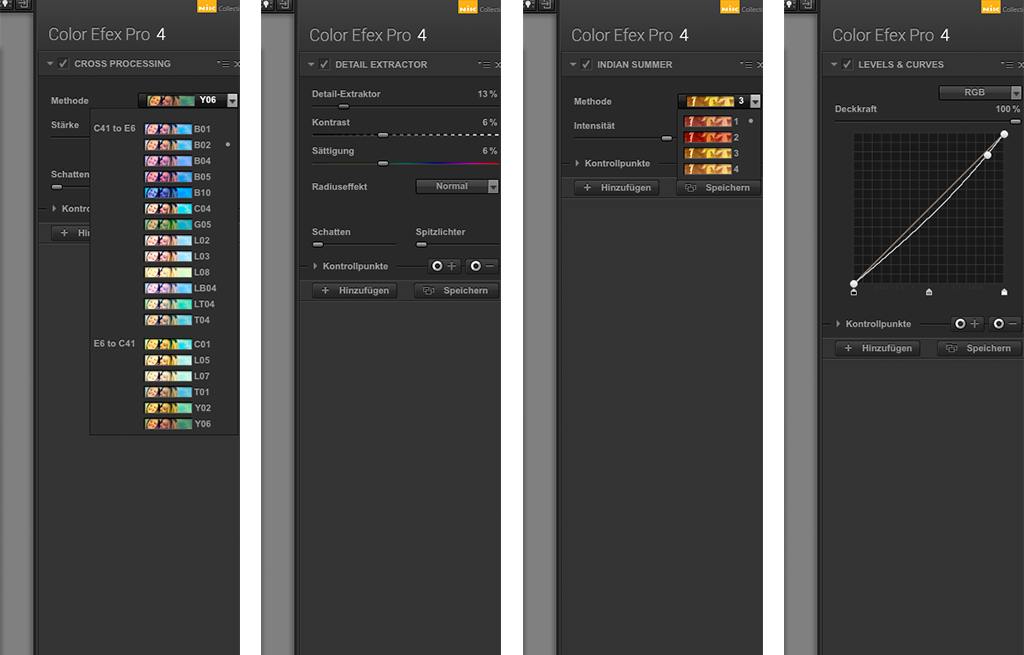
Merge Layers (all) again, and open the Oil Paint Filter. Set the properties as shown in the picture below. The opacity for this layer should not exceed 30%.

 
Michael Wandrey Tutorial 11
 

Post-processing the Merged Image

Now we need a light cloud texture. For this, I took a photo of a cloudy sky, placed it above the image and masked it, so that no hard transitions can be seen.

Now we copy the layer and mirror it vertically for the bottom half. The masking should be adjusted here. The transparency of the layers are as follows: top layer: 12% opacity, bottom layer: 21% opacity.

 
Michael Wandrey Tutorial 12
 
Now add a New Layer with white color and add two cloud brushes. The opacity for this layer was roughly 63%.
 
Michael Wandrey Tutorial 13

For the Dodge and Burn action, we need a New Layer in Overlay Mode and 57% opacity. For this, use the Dodge and Burn Tool and set the Exposure to 12%.

Now we will use the Dodge and Burn Tool to lighten the bright areas and darken the dark areas accordingly. Set the transparency for this layer to 55%.

 
Michael Wandrey Tutorial 14
 
Add a Gradient Layer with Soft Light Blending Mode. Set the preferences as shown on the screenshot below. The opacity for this kind of effect should be roughly 76%.
 
Michael Wandrey Tutorial 15

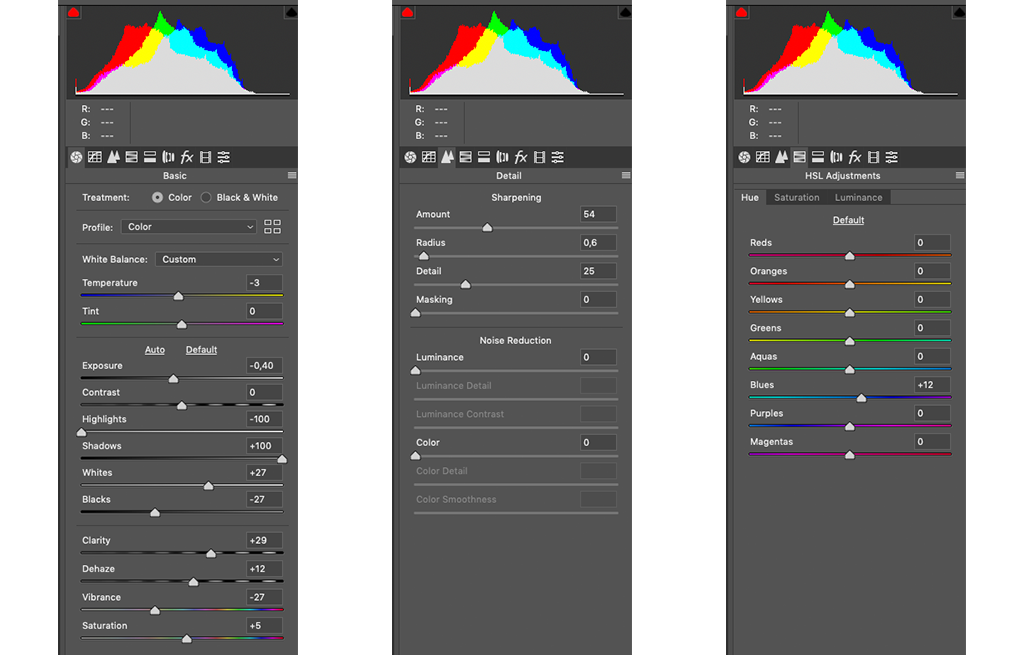
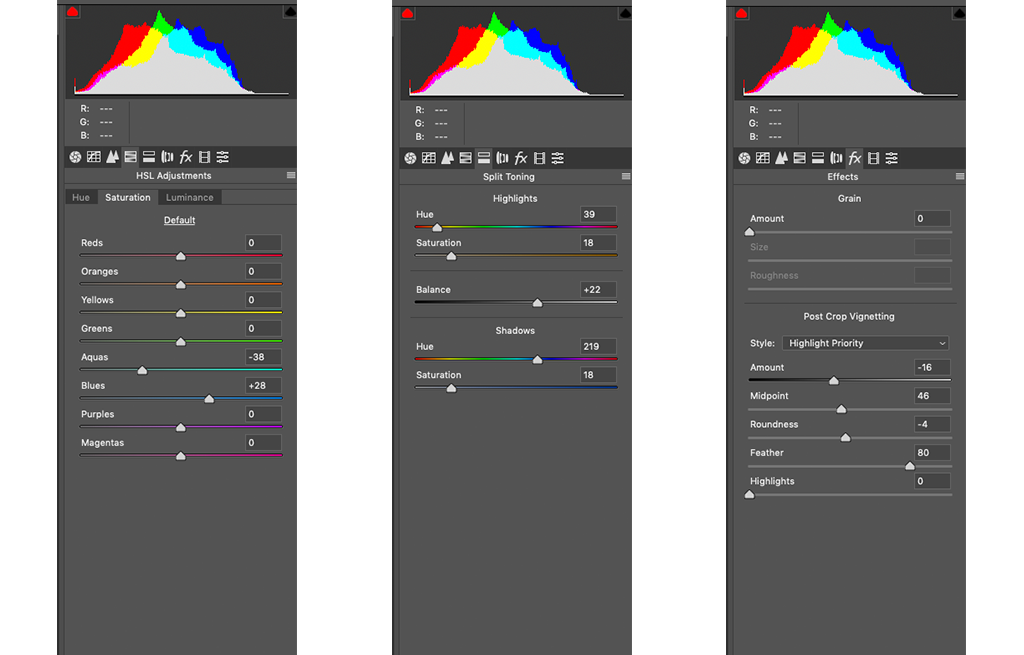
Finally, we have to merge all layers and perform the RAW Development once again (shown earlier in the tutorial). The transparency for this layer, should only be 65%.

 
Michael Wandrey Tutorial 16
 

And there you have it: a perfectly surreal composition using PixelSquid and Photoshop!

Michael Wandrey is a Dusseldorf-based part-time photographer and digital image editor who started working with Photoshop roughly 20 years ago. Since discovering PixelSquid, he has used it in almost all of his subsequent compositions. His Racing Snail composition was recently featured in the 2019 edition of PhotoshopBIBEL.