As digital art becomes more ubiquitous, working digital artists often need to iterate on concepts at high speed. Video game 2D artist and student Camilo Polanco shows us how he uses PixelSquid objects to create a fully fleshed out post-apocalyptic mood piece, complete with aged ruins and overgrown flora, without the hassle of clipping and masking leaf-by-leaf. Read on to see how he quickly Photoshops with PixelSquid!
First I start with the background. This graffitied wall image is unedited, but I plan to fix that in the following steps.
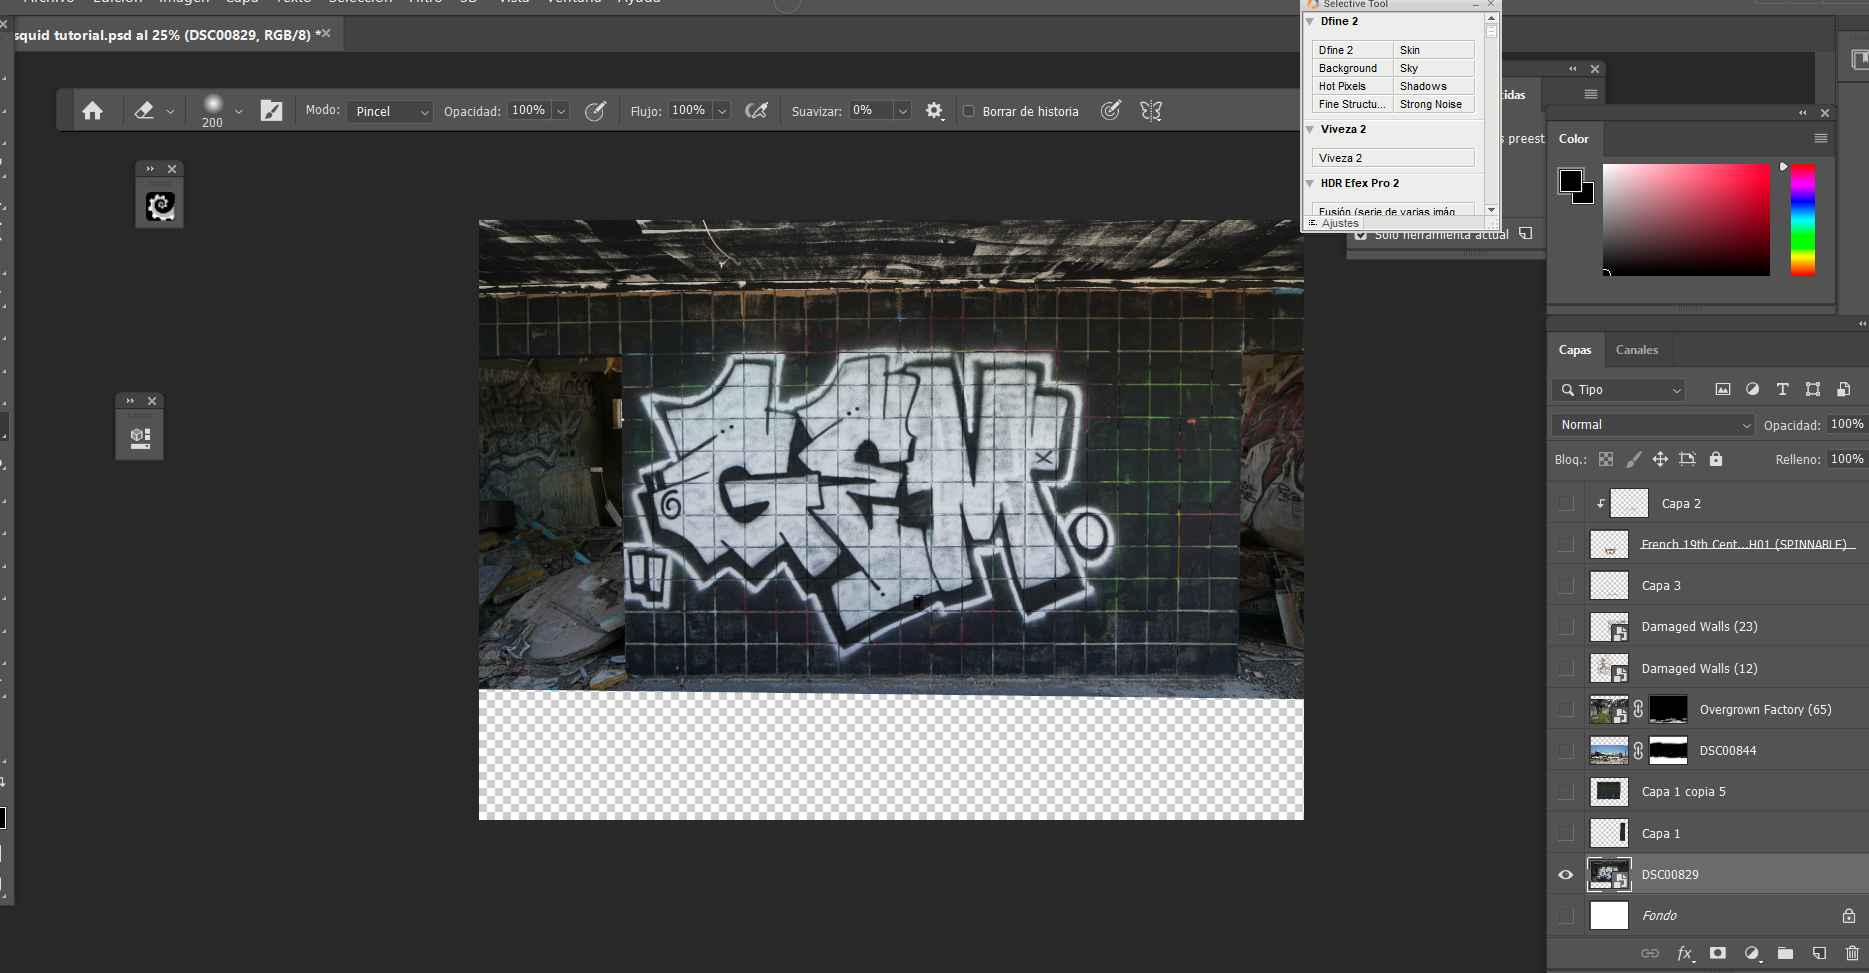
I want to cover that graffiti. To do this, I select the empty side of the wall on the right with the lasso tool, then I copy + paste to duplicate the area four times and place those images over the graffiti wall.

Next, I want to use this rubble image as the floor, to elicit a feeling of destruction in the scene.
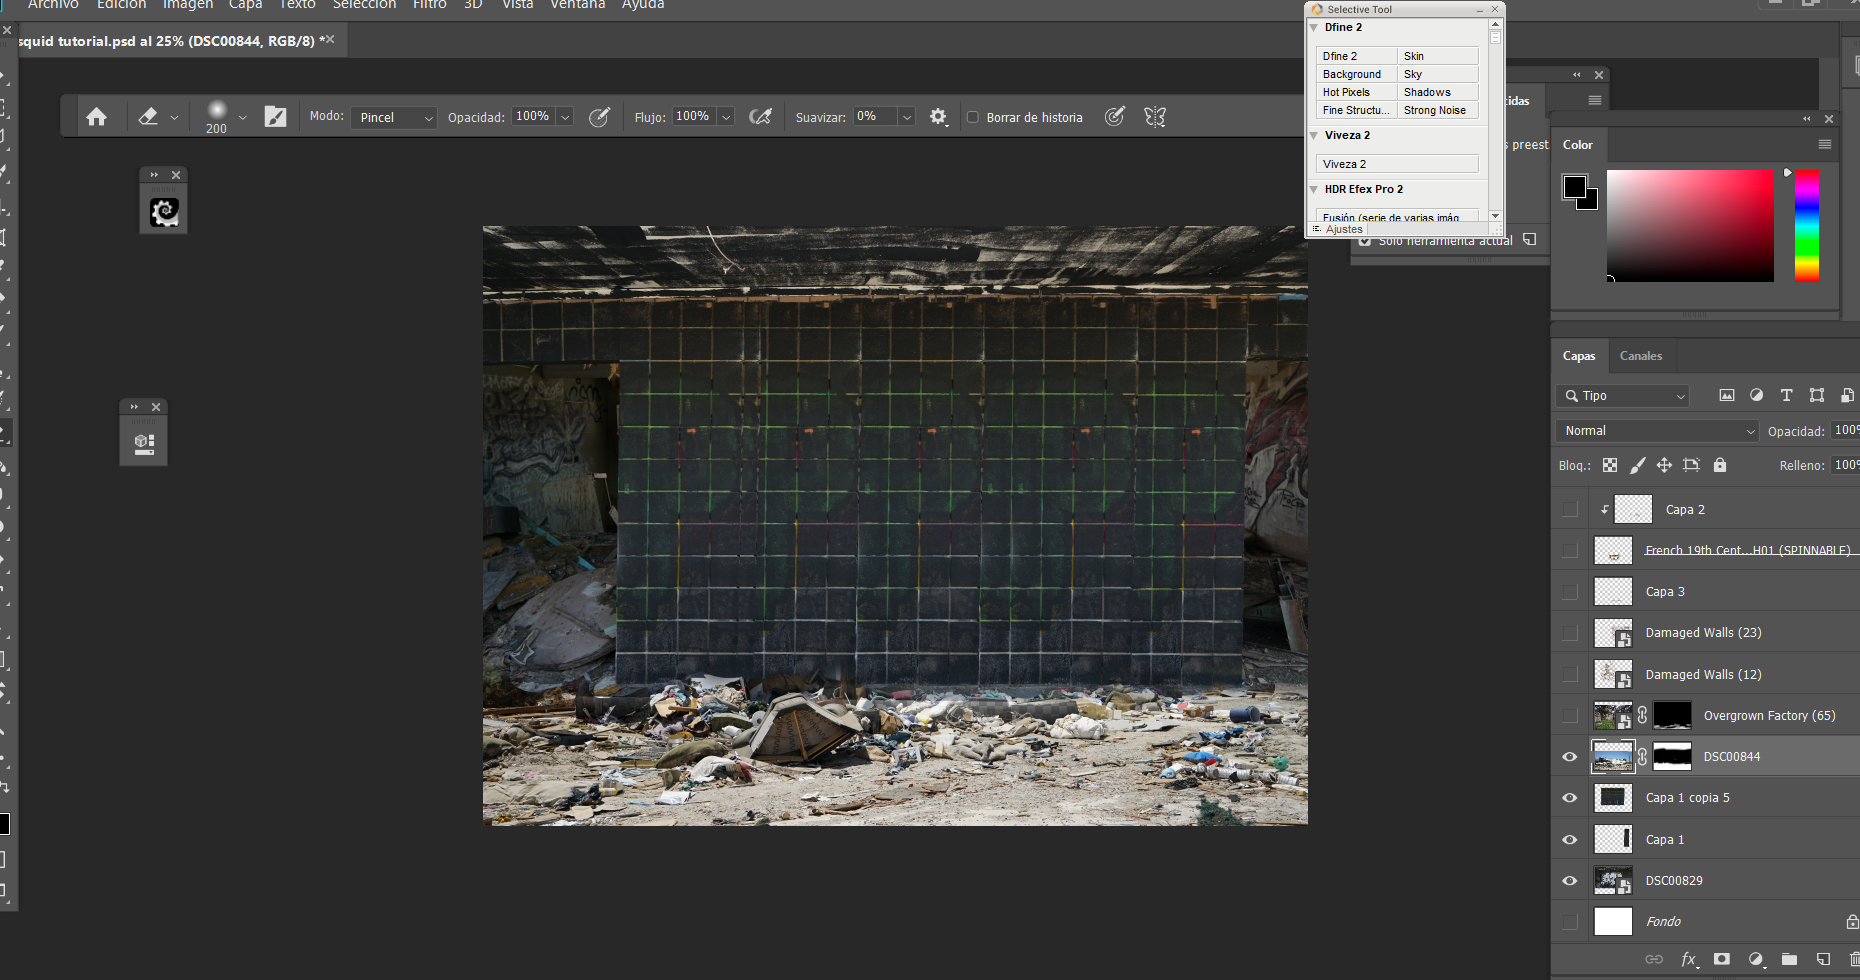
I’m working toward a post-apocalyptic environment, so I add some grass to the floor, since I want this scene to look very old and abandoned.
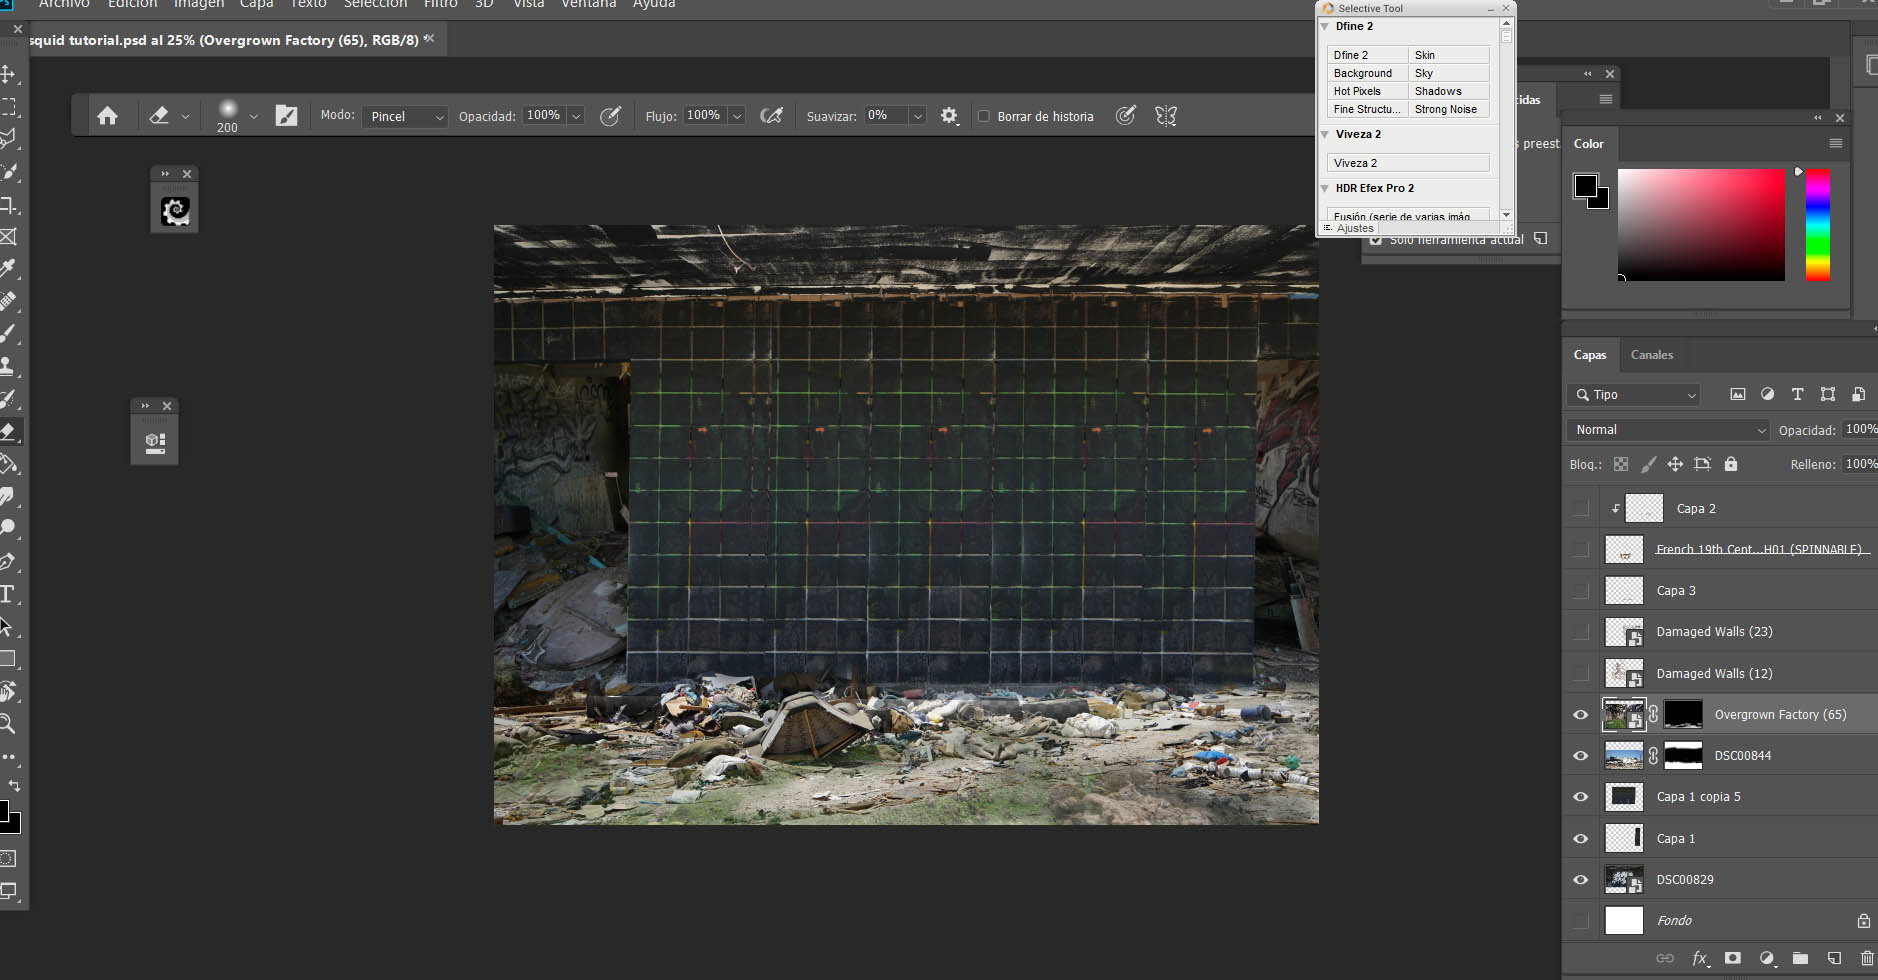
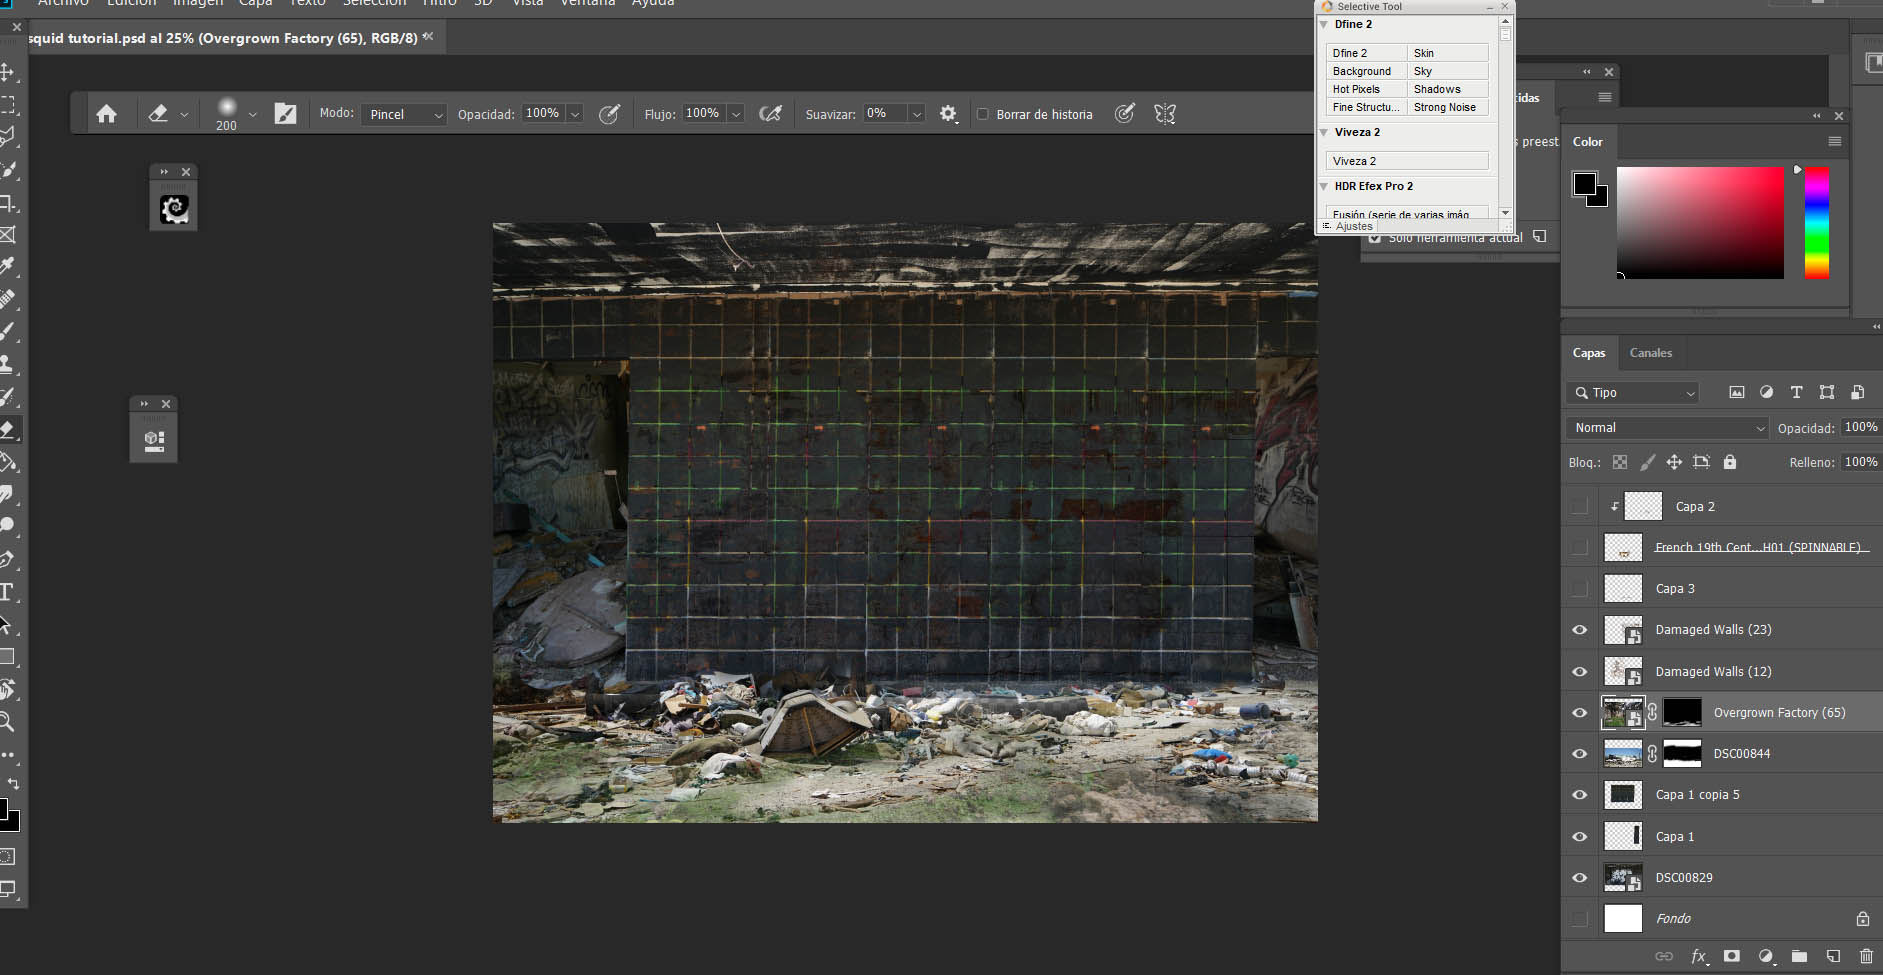
I add some textures to the wall to give it the aged feeling. Now it looks like it could be a bit moss-covered. It probably hasn’t been touched by a human in decades.
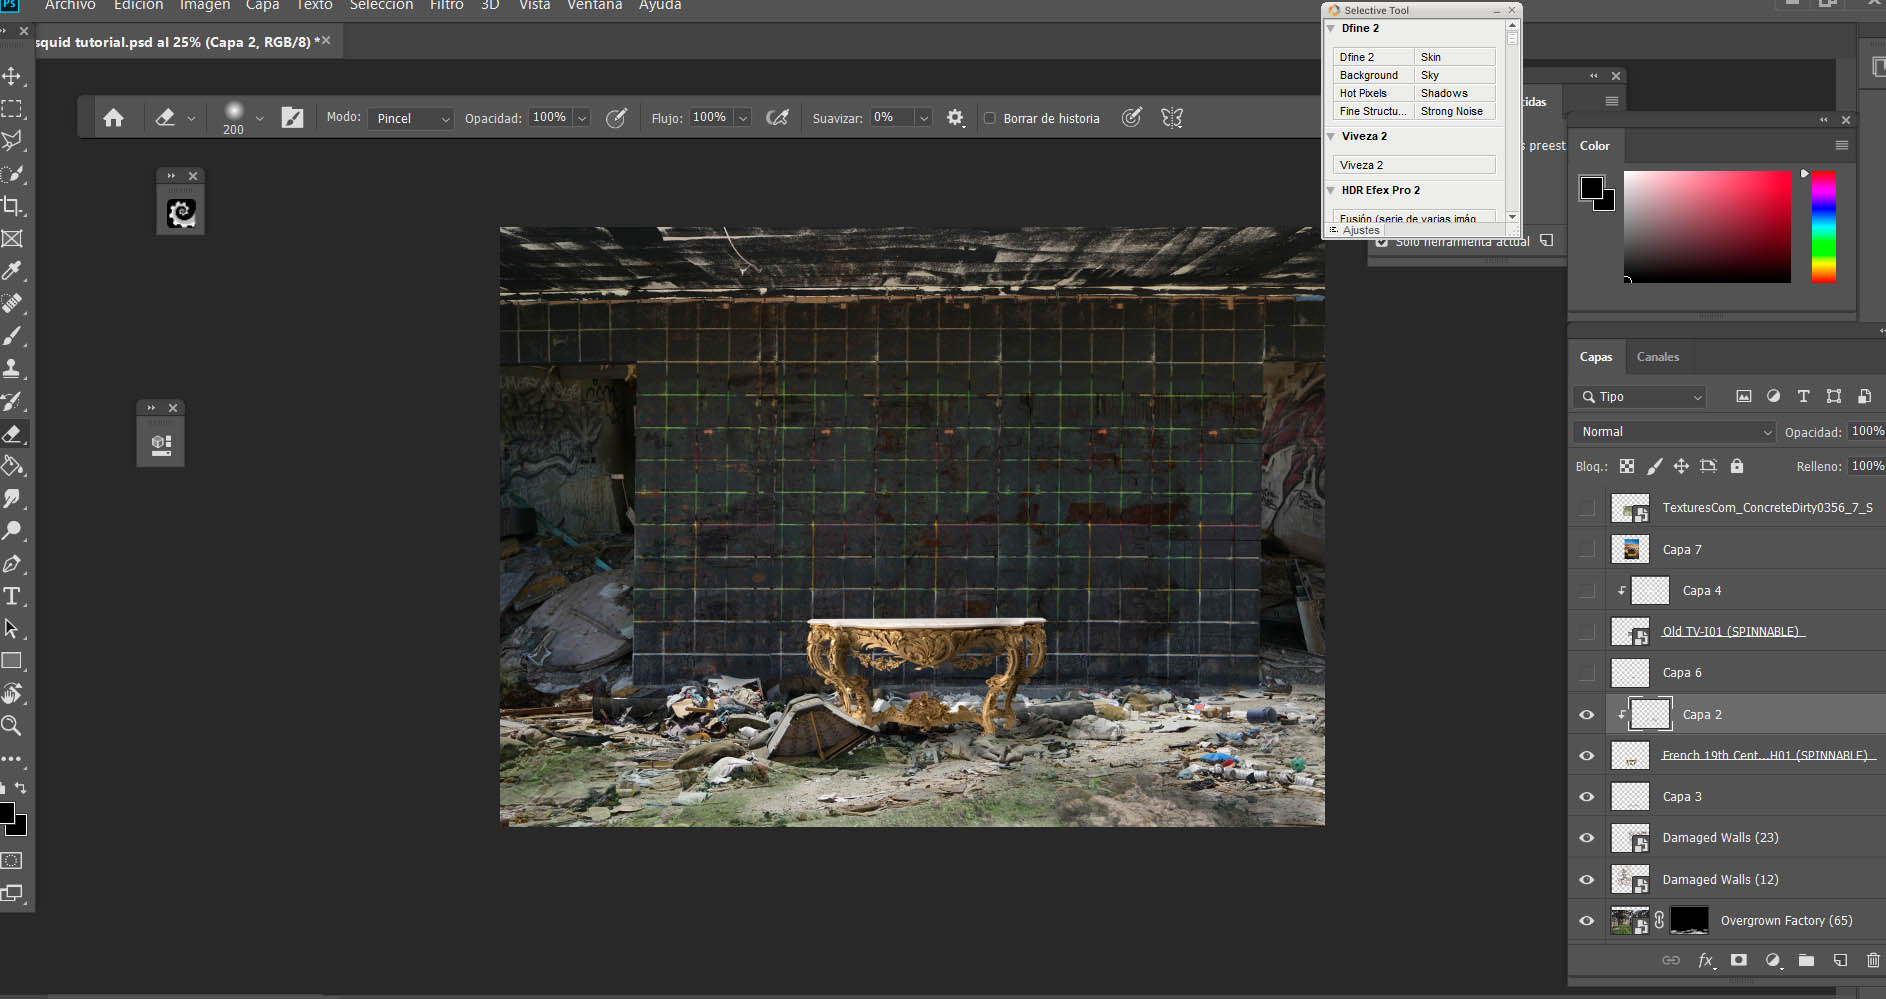
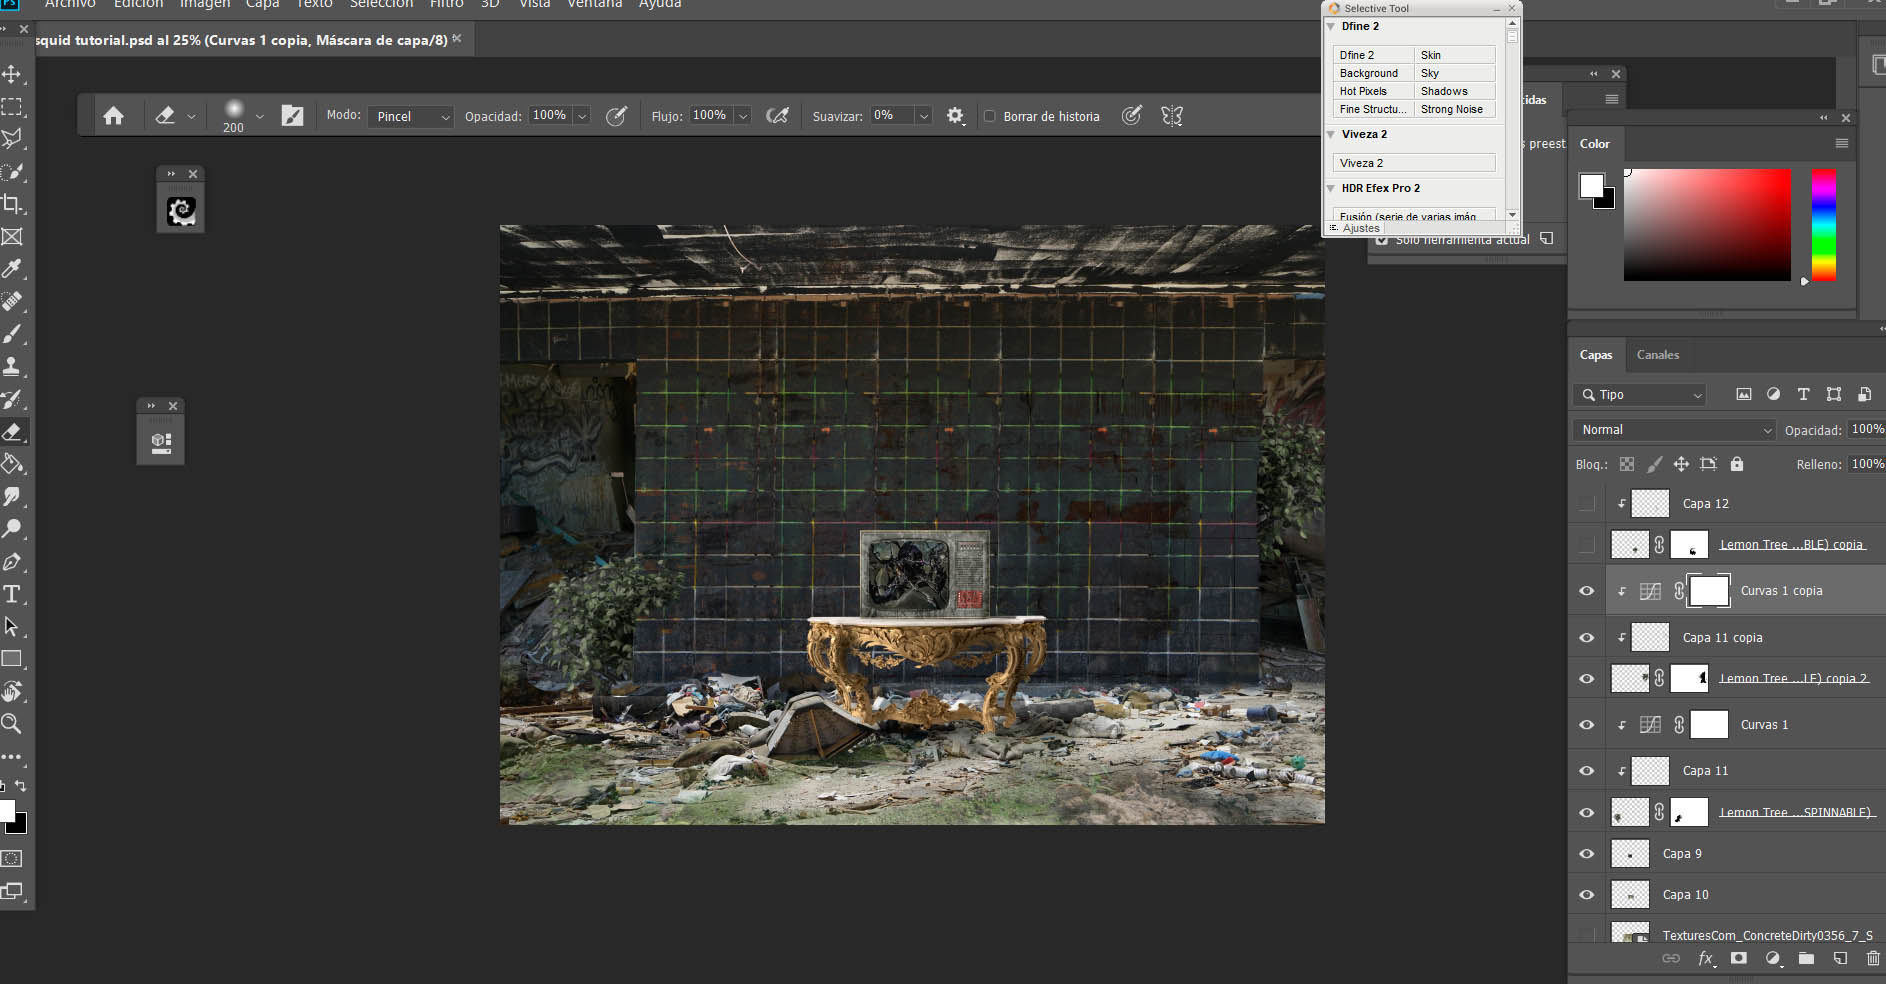
Now that the backdrop is ready, I start to build the focus of this composition. I want this to feel realistic, so I’ve chosen the PixelSquid French 19th Century Louis XV St Giltwood Freestanding Console.
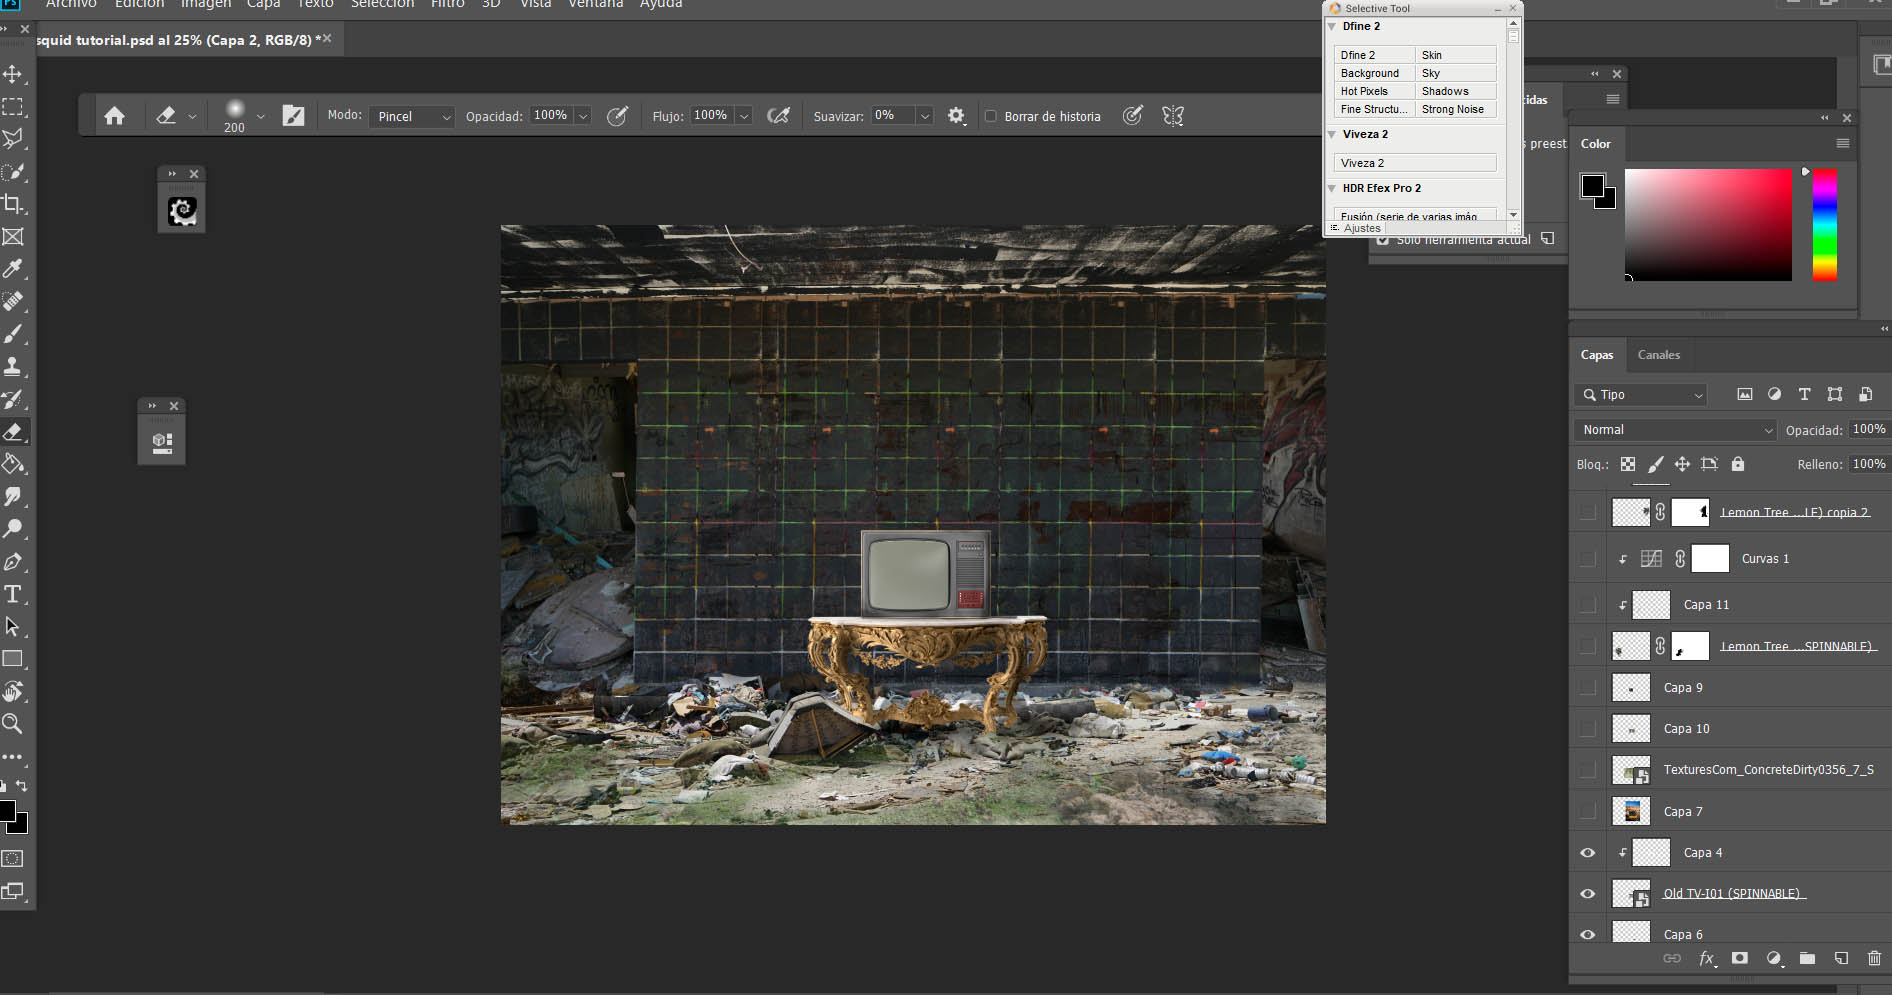
Now it’s time to add the Old TV PixelSquid object. I place all the PixelSquid objects in the scene using the PixelSquid extension for Photoshop. The extension is great if you’re working in Photoshop a lot like I am, or if you aren’t quite sure what perspective you want from the stock objects. I knew I wanted a head-on perspective like this, so, if I were working in another program like GIMP, I could have just as easily used the PixelSquid website to find the desired angle of the object and downloaded a .png file of that perspective directly to import into my composition.
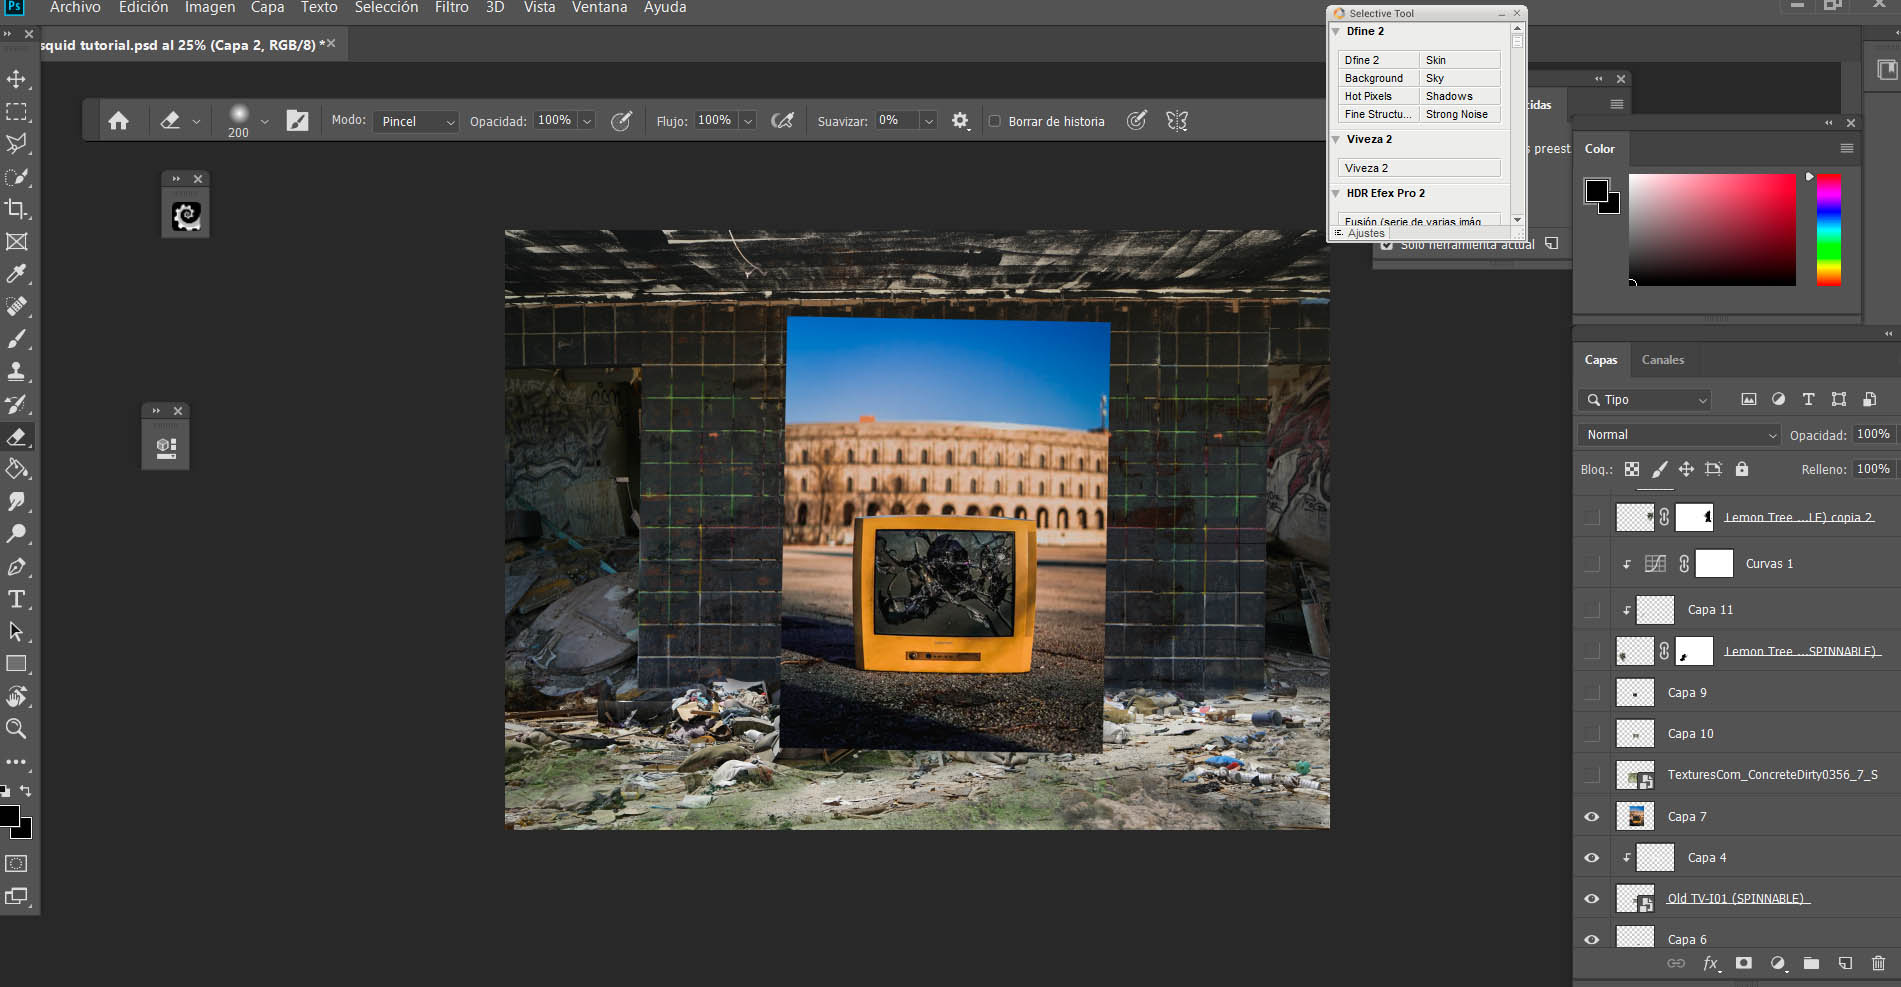
Now that the background and focus are in place, I have to build the environment that will project the post-apocalyptic theme. This TV needs to be broken to fit in with its surroundings, so I’ll use this image with a broken screen as a reference. Using the lasso tool, I select the screen and press ctrl + j to duplicate the selection.
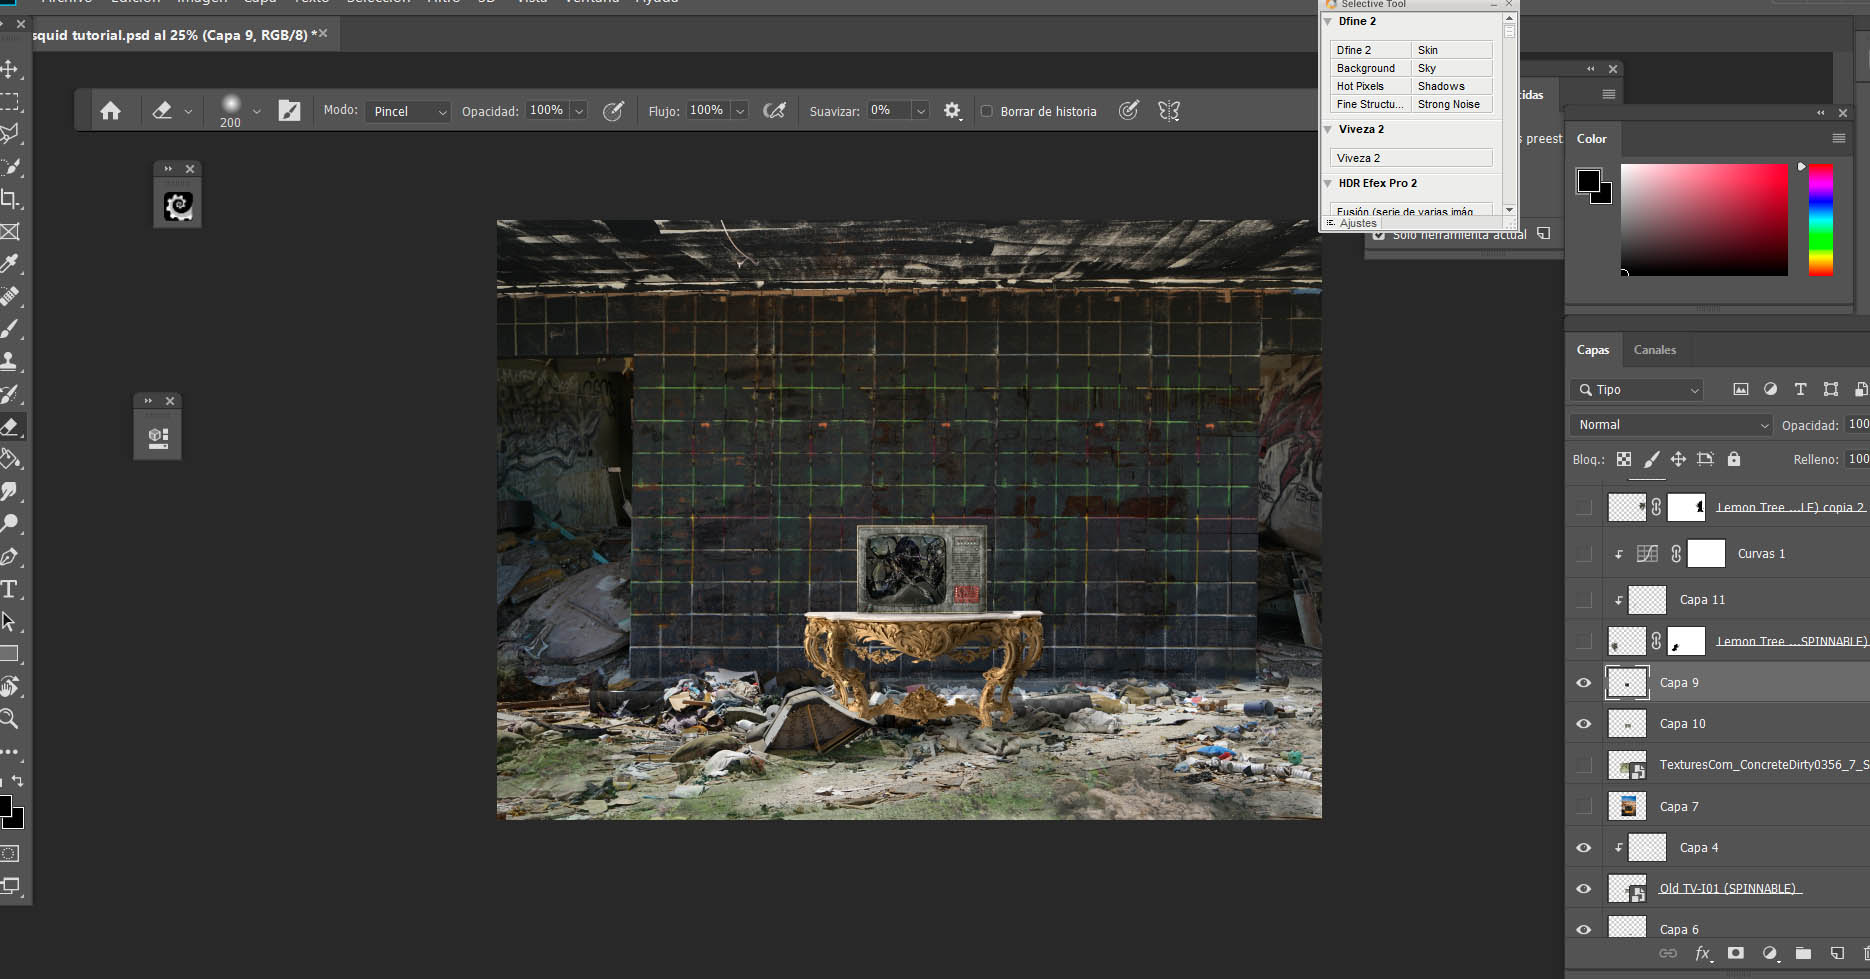
I scale the broken screen to our Old TV element. I also add texture to the Old TV by painting on a dark green color with a brush, using Overlay blending mode.
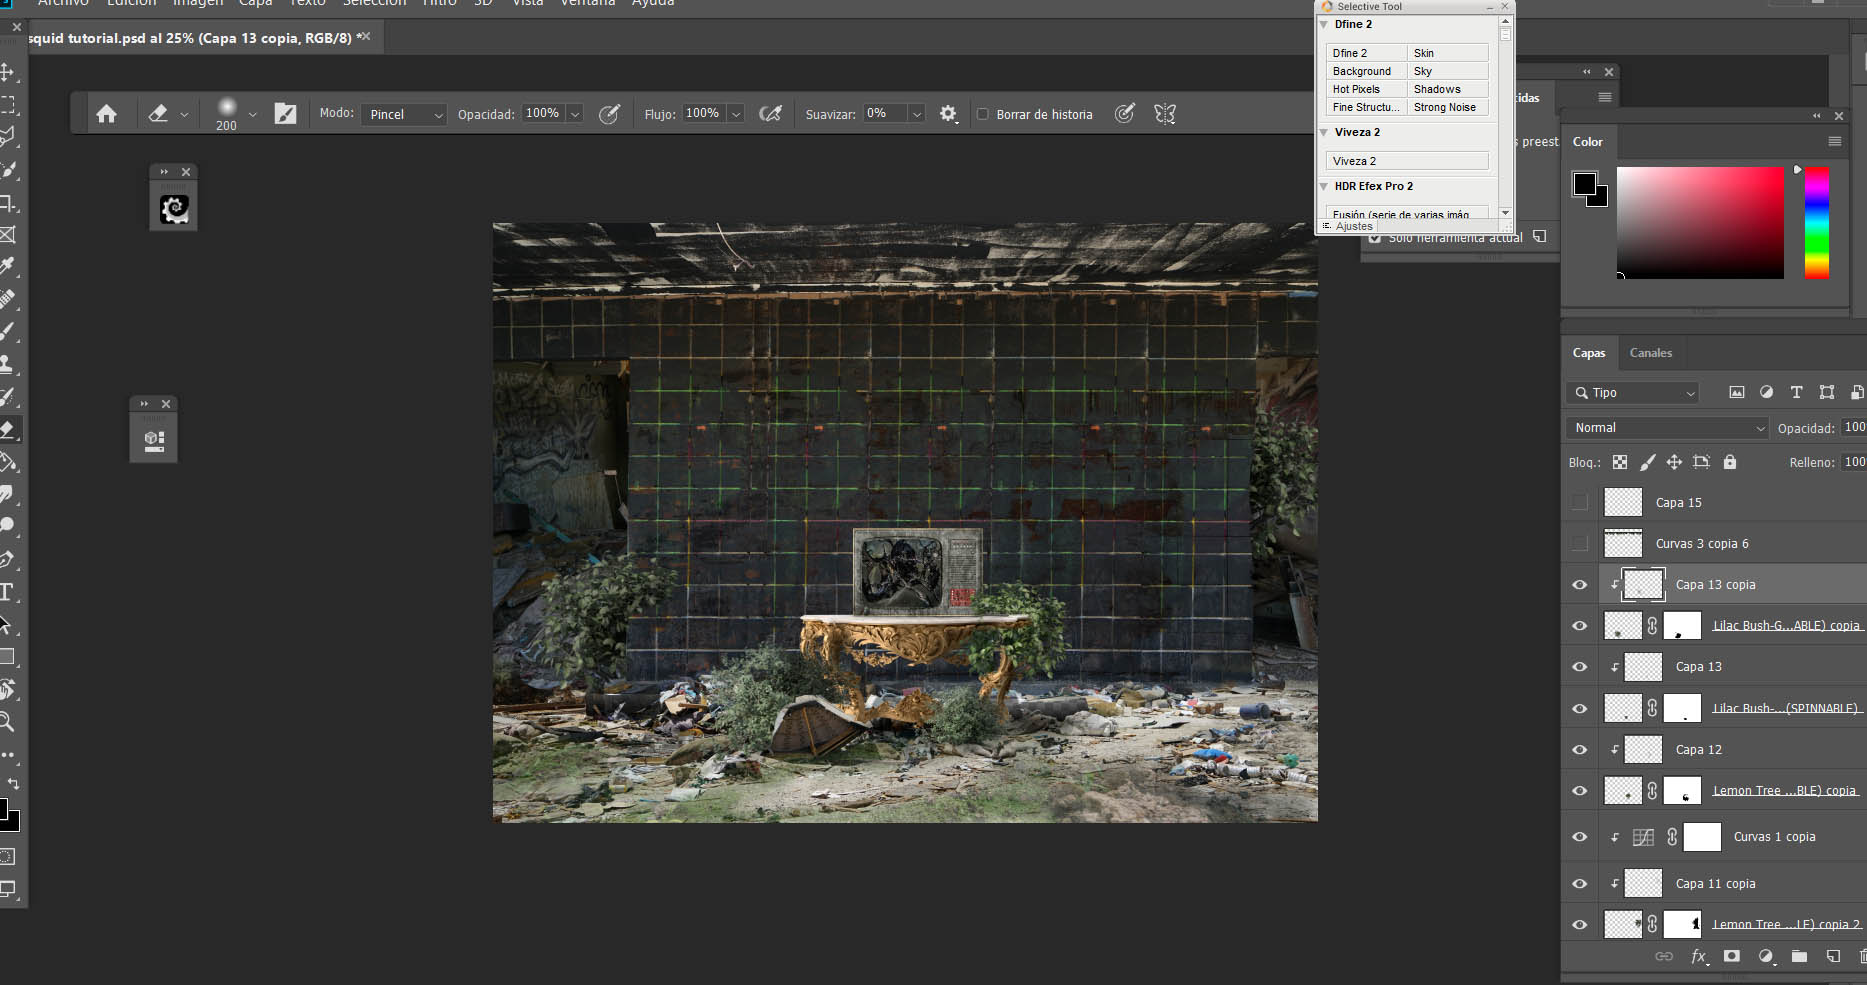
I added some grass to the floor area, but I want more realism, so I add the Lilac object from PixelSquid on the right and left sides of the wall. Once these objects are in place, I’ll mask the layer and paint over to erase half, to make it look like the bush is growing around the back of this wall.
Next I add the Lilac element to the Console as well and the slightly different Lilac Bush on the floor. Utilizing the spin feature on the PixelSquid Photoshop Extension, unique but similar greenery objects can make the scene feel more realistic than just a compilation of stock images. It would be a real pain to get this detailed shrubbery look from traditional stock, since I’d have to mask everything.
I’ll cover the top of this wall with an Ivy element, also from PixelSquid, to complete the elements in this composition.
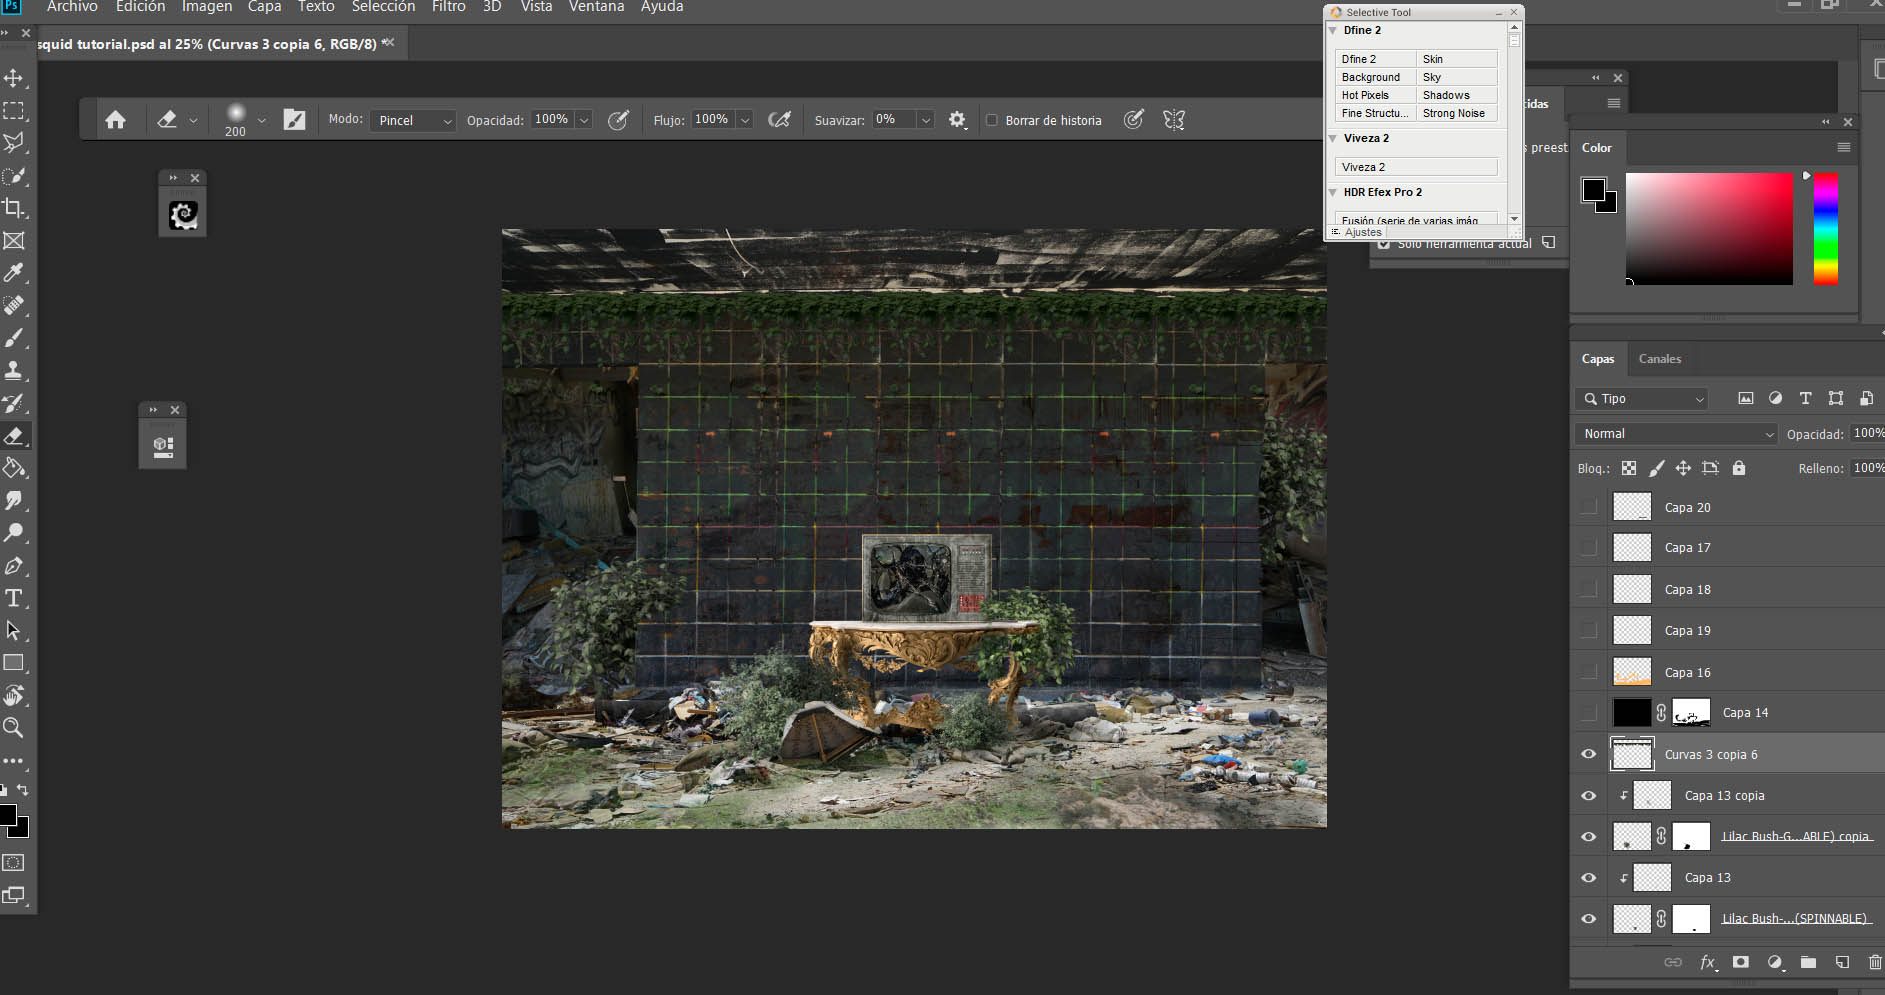
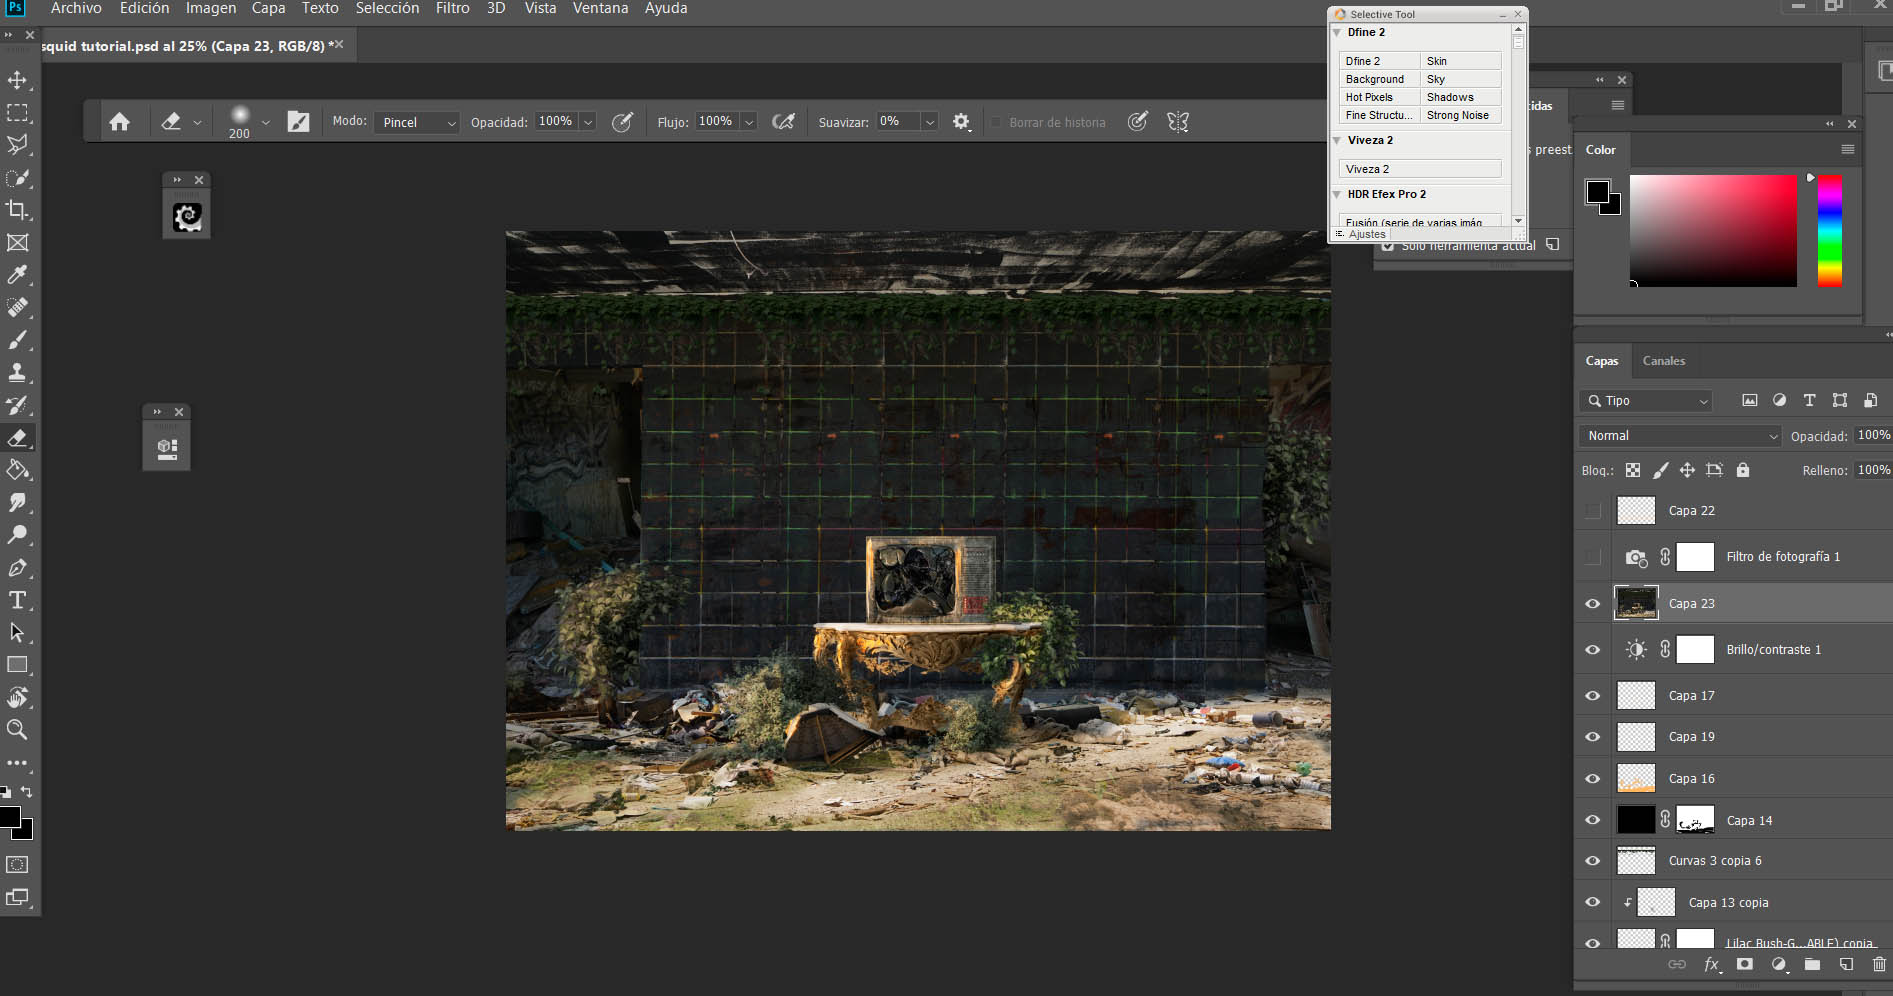
Now it’s time to fix shadows and lights. This step is very important because it’s the magic trick that blends all the elements together realistically in the scene. First, I change the Curves settings on the wall and the background to darken them.
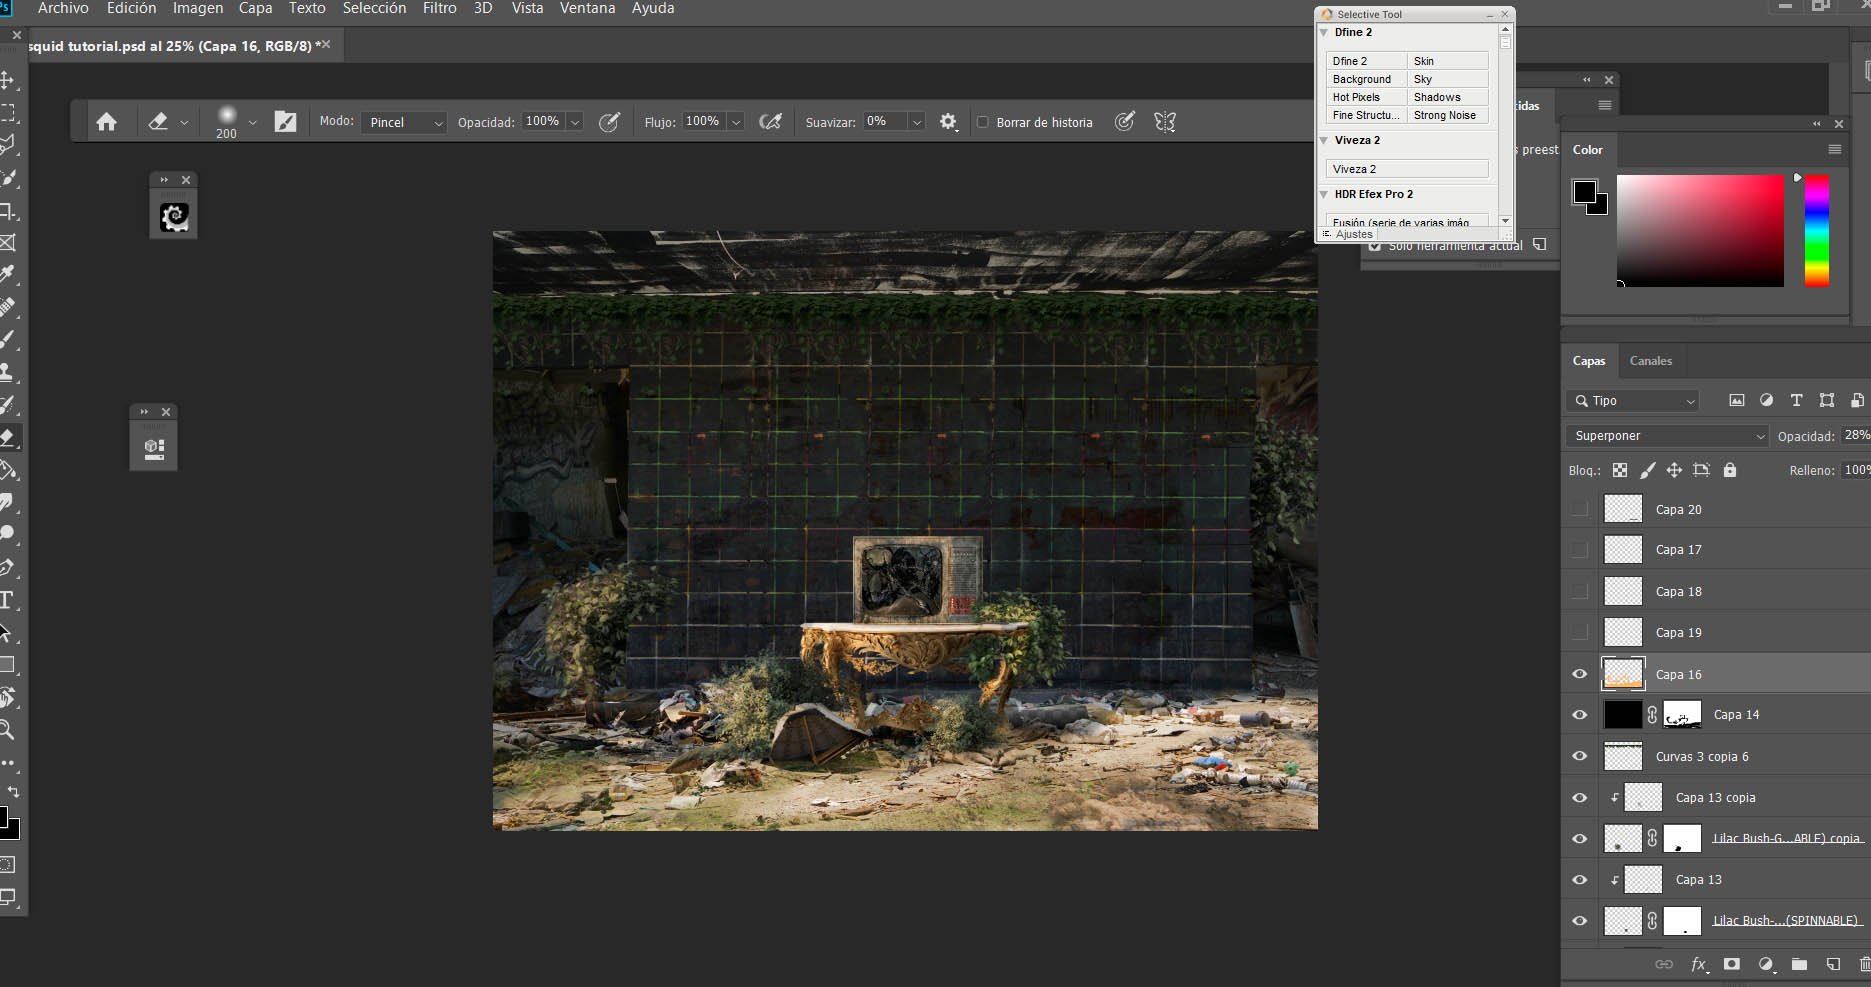
Now, with a soft round brush and overlay at 50% opacity, I’ll paint with orange in the parts where I think I need highlights. I mostly focus the highlighting on the TV tableau I assembled front-and-center, but I also include some highlighting on the ground to give the impression of sunbeams creeping up on our dark backdrop.
I create a new layer and make some brights with overlay at 70% opacity, while still using the soft round brush and orange color from the previous step. This gives an extra brilliance and pulls the eye to our focal point.
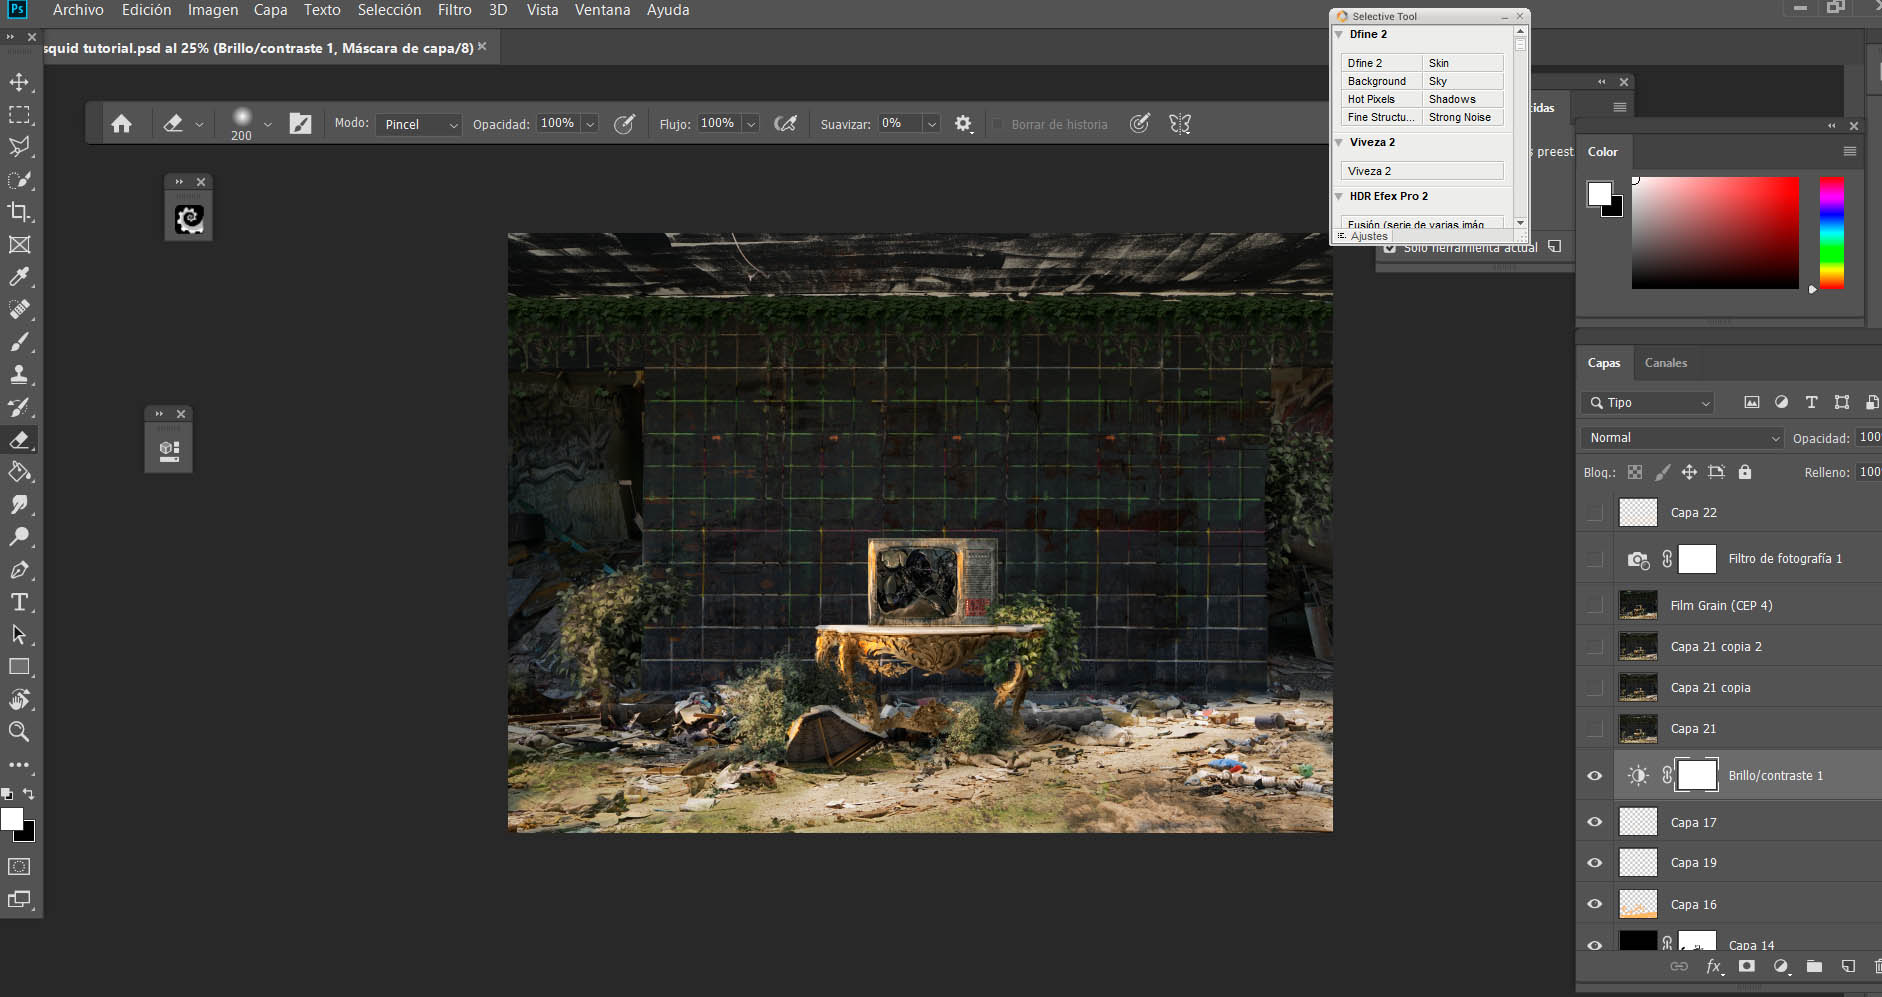
Now I accentuate the shadows under the Console. For this step, I use the lasso tool to create the silhouette of the shadow and then fill the space with black.
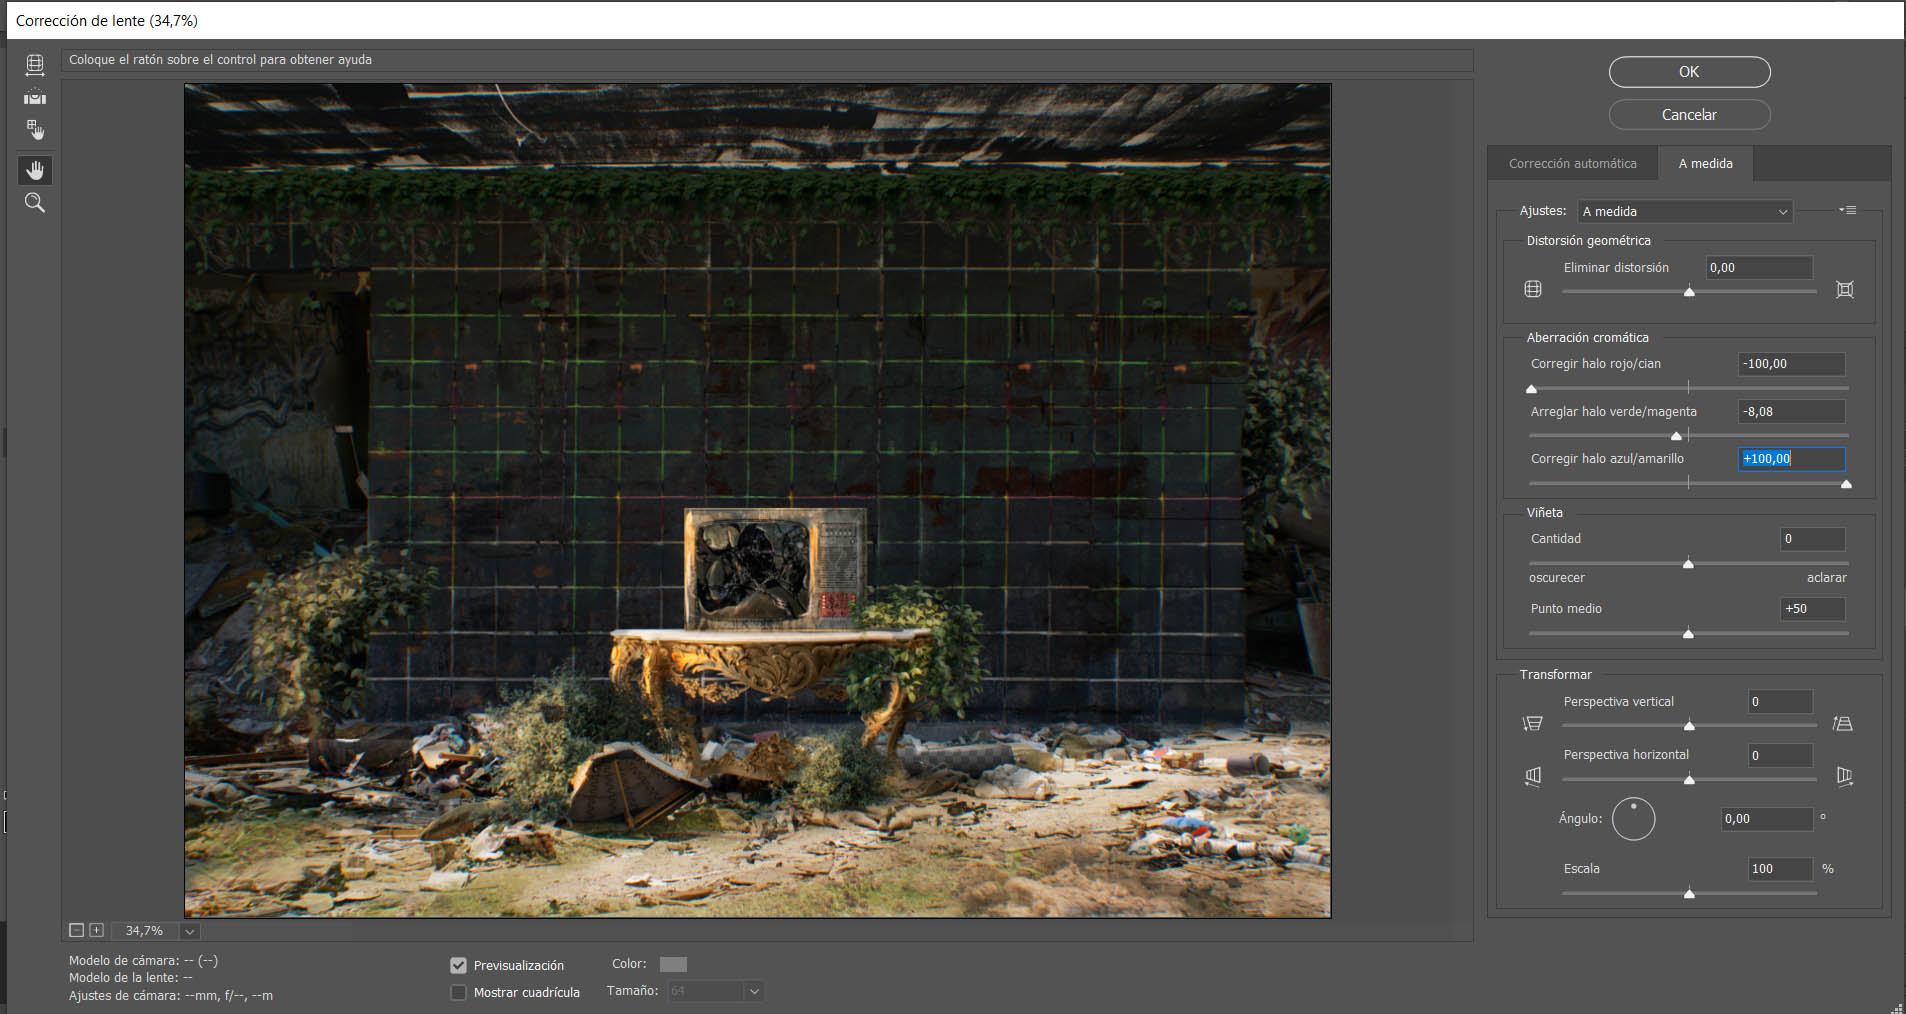
To make it more realistic, I want to add some chromatic aberration. Go to Lens Correction and find “Options” on the right side of the panel. Click the second tab (“Custom”) and set the next values: red/cyan -100.00 and blue/yellow +100.00.
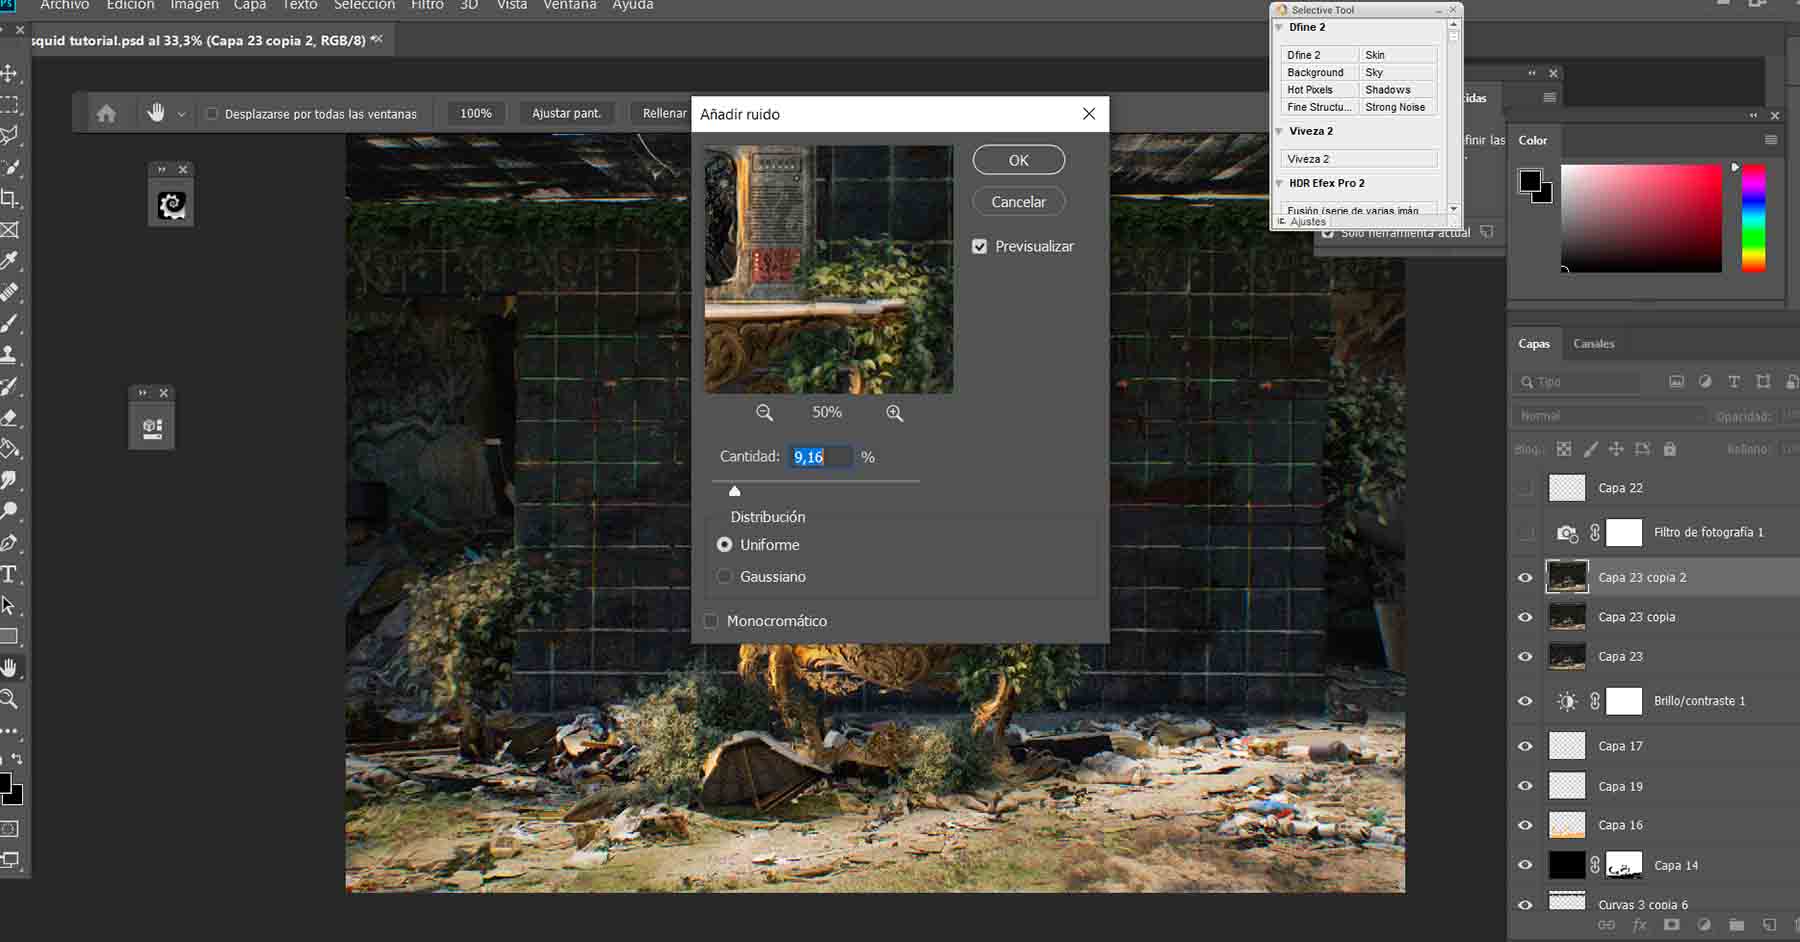
Having different photo resolutions can be a dead giveaway that a composition is Photoshopped. To blend the different resolutions in all of the images into only one, go to Filter > Noise > Add Noise. Playing with the settings can take some trial and error to make it feel right. I used 9.16% as my noise value for the final piece.
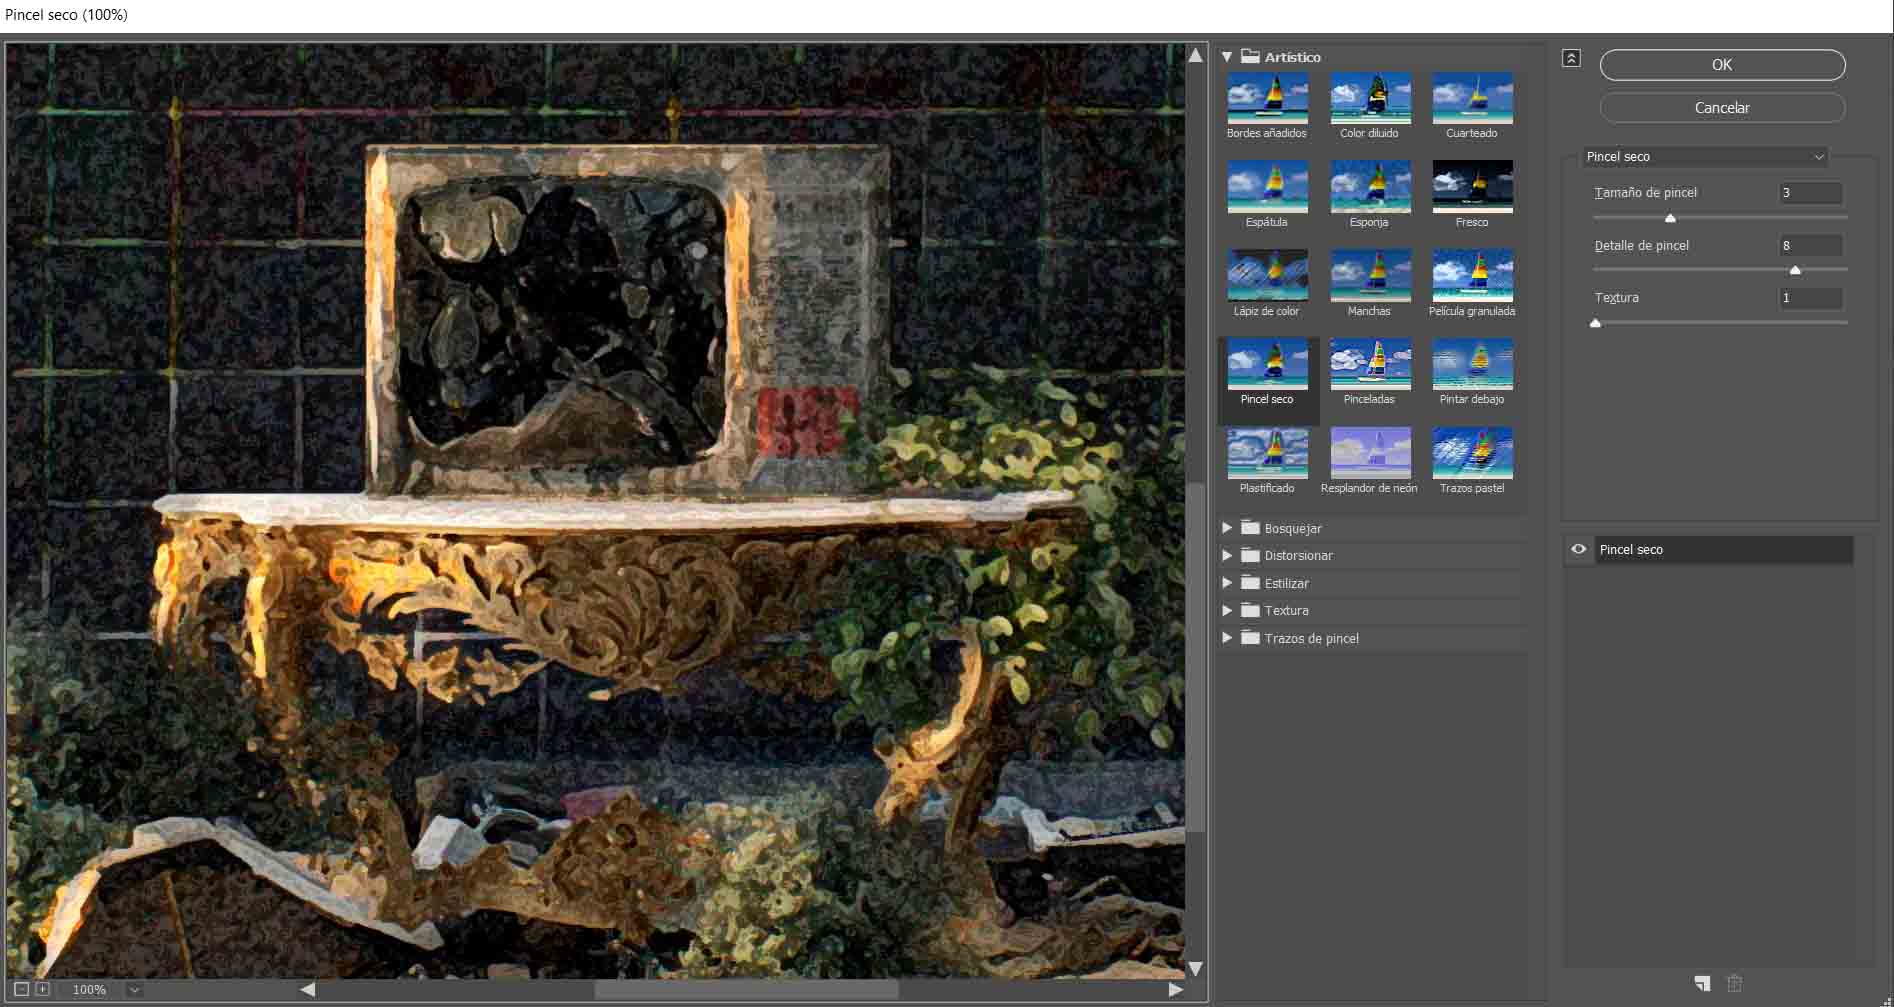
Last I add some artistic style to the abandoned scenario. To make the final product feel more like a painting, go to the Filter gallery and select Dry Brush. For the final look, I created a brush with the values: brush size: 3, brush details: 8, texture: 1.
Here we have the final product: a realistic post-apocalyptic scenario! I hope you have enjoyed the tutorial!
![]()
Camilo Polanco is a graphic design student and 2D digital artist working in the video game industry. He is passionate about creating scenes that tell stories and making post-apocalyptic art. You can find more of his work on his Instagram.
If you’re interested in being featured in our artist tutorials and spotlights, you can email our content team at marketing@turbosquid.com.